Friday, September 26, 2014

Broccoli Slaw

Serves 12 (1/2-cup servings)
1/3 cup currants
2 pounds broccoli, about 1 large head
1/4 pound red onion (1/2 small onion), finely chopped
3/4 cup almonds, slivered or roughly chopped
1/2 cup mayonnaise
2 tablespoons lemon juice
2 tablespoons rice vinegar
2 tablespoons sugar
1 teaspoon salt
Freshly ground pepper
Heat 1/2 cup water to boiling and pour over the currants in a small bowl. Set aside for 5 minutes, then drain.
Shred the broccoli in a food processor, using the grater disk (the attachment with the holes, not the blade). In a large bowl, combine the shredded broccoli, currants, red onion, and almonds.
Whisk together the mayonnaise, lemon juice, vinegar, sugar, salt, and a generous quantity of fresh pepper. Pour the dressing over the broccoli mixture and stir to combine. Taste and add more salt or pepper, if needed. Allow to sit for 30 minutes (or an hour in the fridge) so the flavors can mingle.

Recipe Notes

  • Quicker Slaw: If you do want to skip the broccoli shredding, substitute about 6 cups of pre-shredded broccoli slaw mix for the whole broccoli.
  • Reader Tip: We love the reader recommendation of substituting dried cranberries for the currants.

Saturday, September 20, 2014

How to Make Vegetarian (or Vegan) Chili without a Recipe

From Food52.

There’s something about chili -- so versatile and satisfying. Top it with cheese, sour cream, avocado, crumbled crackers, or diced fresh onions and hot peppers. Roll it into a tortilla with some rice. Pour it over a burger. It’s all good. 

My favorite recipe is a vegetarian version from my former restaurant in Fredericksburg, Virginia. Dedicated carnivores and vegans alike happily slurped it up. If you prefer meat in yours, by all means go ahead -- it’ll be terrific. 

I like to think of chili in terms of ratios. However you decide to proceed, and whatever ingredients you use, stick to about 2 parts diced vegetables : 2 parts cooked or canned beans : 2 parts tomatoes : a little less than 1 part (optional) added protein like tofu. This is a loose guideline, of course, but it gives you something to jump off from.

Let’s make it happen.
How to Make Vegetarian Chili Without a Recipe

1. In a big heavy pot, heat up a pat of butter or a glug of oil of your choosing. Sauté some diced onions, whatever combination of hot and bell peppers you like, and garlic. If you feel like some finely diced carrots, leeks, or celery, too, go for it. Add some salt and stir.
Vegetarian Chili from Food52
2. Add spices. I’ve used chili powder, cumin, turmeric, smoked paprika, chipotle, and various ground peppers; you should use whatever tastes like chili to you. Use 2 to 3 times as much assorted chili powders as cumin and turmeric. This is really to taste, but start with 1/2 teaspoon of cumin per cup of tomatoes if you need a benchmark. Salt and pepper to taste. If you didn't put in fresh garlic, add garlic powder here -- shoot for about the same amount of garlic powder as cumin. 

Vegetarian Chili from Food52
3. Now, get your can opener ready! You’ll need beans and diced tomatoes. I love to use fire-roasted diced tomatoes and diced tomatoes with green chilis, but you can use your favorite. As for beans, I prefer a combination of kidneys, garbanzos and black beans. If you like to work with dried beans, I recommend cooking these first and then adding them now. You will probably also need to add 1 part water or stock at this point. Fill your empty tomato cans with stock or water as a measuring guideline and pour in liquid until it looks like chili. 

Vegetarian Chili from Food52
4. Add more protein if you like. I’m a fan of tofu, so I cut a block of extra-firm into smallish cubes and toss it in. Tip: If you freeze tofu ahead of time, then thaw, then squeeze all the water out before you use it, you’ll be blown away by the texture. 

Vegetarian Chili from Food52
5. Now just simmer for about an hour, mostly covered. Then add spice as needed and enjoy! Don’t forget to serve it over scrambled eggs for tomorrow’s breakfast. 

Vegetarian Chili from Food52
Round out your Tex-Mex menu with some other classics:

Tomato Soup (and other Soups from Food52)

From Food52

More soup recipes.

This is a spicy tomato soup that you can make on a whim and eat nearly as soon. (It's also, at its core, 5 vegan ingredients you probably already have.) Recipe adapted very slightly from Stir: Mixing It Up in the Italian Tradition (Houghton Mifflin Harcourt, 2009). (less) - Genius Recipes
Serves 6

  • 2tablespoons extra-virgin olive oil
  • 1small yellow onion, peeled, halved, and sliced into 1/4-inch-thick slices
  • 1teaspoon red pepper flakes (or to taste -- we started with 1/2 teaspoon)
  • 2(28-ounce) cans whole tomatoes
  • 1 1/2cup water
  • 1/4cup loosely packed fresh basil leaves
  • Kosher salt
  • Freshly ground black pepper
  • Crème fraîche, for garnish (optional)
  1. Heat the olive oil in a large saucepan over medium heat until shimmering. Add the onions and red pepper flakes and cook, stirring occasionally, until the onions are translucent and very tender, about 10 minutes.
  2. Stir in the tomatoes and their juices, plus the water, and bring to a boil. Reduce the heat to low and simmer, stirring occasionally, until the flavors have melded, about 30 minutes. (If you're in a hurry, you can skip the simmer time -- just add a bit less water.) Add the basil, season with salt and pepper, remove from the heat, and let cool briefly, about 5 minutes.
  3. Set a fine-mesh strainer over a large, heatproof bowl. Using a blender, purée the soup in batches until smooth, removing the small cap from the blender lid (the pour lid) and covering the space with a kitchen towel (this allows steam from the hot soup to escape and prevents the blender lid from popping off).
  4. Pour the blended soup through the strainer, pressing on the solids with a rubber spatula or ladle; discard the solids. Taste the soup and season with additional salt and pepper as needed.
  5. Return the soup to the saucepan and reheat on medium low until hot. If you choose, serve topped with a tablespoon of crème fraîche.

Vietnamese Rice Noodle Salad

From Food52.

Author Notes: Excerpted from DELANCEY, by Molly Wizenberg (Simon & Schuster, 2014) 

Vietnamese Rice Noodle Salad
During Delancey's gestation, and for a long time after it opened, we ate a lot of takeout. One of our favorite quick, cheap lunches was (and still is) a Vietnamese rice noodle salad called bun, and we like it enough that now, sometimes, we even make our own version at home. Don't be put off by the number of steps. The dressing, a take on nuoc cham, can be made a few days ahead, and if you've got the ingredients on hand and the dressing prepared, you can bang this meal out in very little time. 

This salad is wide open to adaptations and a great vehicle for using up leftovers or odds and ends. Take the recipe and run with it, using whatever vegetables and cooked meats you have on hand. 

(And though it changes the whole concept, try substituting hot freshly cooked rice for the noodles. We do that often. I like to use Calrose, an inexpensive Japanese-style medium-grain rice that's grown in California and commonly sold in Asian grocery stores.) (less)
 - MollyandBrandon
Serves 2 to 3
The dressing
  • 3tablespoons fish sauce
  • 3tablespoons freshly squeezed lime juice
  • 2 to 3tablespoons light brown sugar
  • 6 to 8tablespoons water, to taste
  • 1medium clove garlic, minced
  • 1fresh Thai (also sold as "bird's eye") chile, minced
The salad
  • 8ounces thin rice noodles (roughly the width of linguine)
  • 3 or 4napa cabbage leaves, thinly sliced crosswise
  • 1medium carrot, shredded or cut into matchsticks
  • 1/2cucumber, halved, seeded, and thinly sliced
  • 1handful chopped fresh herbs, preferably a combination of basil, cilantro, and mint
  • 8ounces cooked meat or shrimp, cut or torn into bite-sized pieces
  • 1/2cup salted peanuts, coarsely chopped
  1. To prepare the dressing, combine the fish sauce, lime juice, 2 tablespoons of the brown sugar, 6 tablespoons of the water, the garlic, and the chile. Whisk well. Taste: if it's too pungent, add more water, 1 tablespoon at a time. If you'd like more sweetness, add more brown sugar, 1/2 tablespoon at a time. Remember that you're going to be putting this dressing on unsalted vegetables and noodles: you want the dressing to have a lot of flavor, but it shouldn't knock you over. Pour into a serving bowl. (Covered and chilled, the dressing will keep for 3 days to a week.)
  2. Bring a large pot of water to a boil. Add the rice noodles, and cook for 4 to 5 minutes, until tender but not mushy. Immediately drain the noodles into a colander, and rinse them well with cold water. Lay out a clean kitchen towel on the countertop, shake the colander to drain away excess water, and then spread the cooked noodles on the towel to drain further.
  3. Divide the noodles between two or three good-sized bowls, depending on the number of diners, and top with the vegetables, herbs, and meat. Scatter the peanuts on top. Allow each person to spoon on dressing to taste. Toss well, and eat. (Alternatively, you can present this salad family-style: Toss the vegetables, herbs, and noodles in a mixing bowl and then mound them on a serving platter. Arrange the meat over the noodles, and top with peanuts. Each diner can scoop their own portion from the platter and dress it as they see fit.)

Easy Soba Noodle Bowl


From Food52.


Most of us are not strangers to soba noodle salads. But buckwheat-based soba noodles can be part of an easy vegan lunch if you boil a single portion (2 to 4 ounces) and mix them with vegetables, tofu or tempeh, and beans. In the bowl you see above, I combined cooked soba noodles with crispy roasted broccoli, avocado, and spicy toasted chickpeas. If you like, you can cook a few portions of soba noodles ahead of time, and then store them for lunches through the week. 
Soba noodles are a good foundation, but what gives this dish its crunch and flavor is the toasted chickpeas, one of my favorite vegan staples. To make them, simply heat your oven to 375° F. Toss two cups of cooked chickpeas with some olive oil, plus whatever herbs and spices you like. To make the spicy chickpeas, I tossed them in chili powder, cayenne, and smoked paprika, and roasted the broccoli at the same time. Once all the components were assembled, a little avocado brought everything together.

Soba with Peanut Sauce


From Food52.

If you’ve ever eagerly anticipated sneaking a bite from a bowl of perfectly-dressed soba noodles, and instead were left staring at a glob of tangled noodles at the end of your chopsticks, we feel your pain. And we’re here to make sure that never happens again.
The secret? You need to wash your noodles. Really. For some reason, most packages of soba noodles don’t tell you this -- but now you’re in on the secret, and no longer need to battle soba that's stuck together and gluey. While you run to your pantry to incredulously look at what's not there on the package, make sure your noodles are made from all (or mostly) buckwheat flour; if they aren’t, buy different ones the next time you’re at the store.
Here's how to cook them -- properly.
How to Cook Soba Noodles, from Food52
Get a big pot of water boiling -- and despite our prior yammering, don’t salt the water. Once it's boiling, add the soba noodles, and give them a quick stir to make sure they all go under water.
How to Cook Soba Noodles, from Food52
Let the water return to a boil, then reduce the heat a little, to keep the water at a simmer. Let the noodles cook for the time prescribed on your noodle package, probably between 5 and 8 minutes -- set that kitchen timer! Meanwhile, ready your colander in the sink, and prepare a big bowl of cold water. (Not an ice bath, though: You want it cold, but not so cold you can’t comfortably stick your hands in.)
More: Cooking with other types of noodles? Here are 3 ways to cook pasta.  
How to Cook Soba Noodles, from Food52
Pull out one noodle from the pot to check for doneness. Soba should not be al dente, it should be fully cooked -- but not cooked for so long that it is mushy. When the noodles are done, drain them into the waiting colander, and then promptly dump them into the bowl of cold water. 
How to Cook Soba Noodles, from Food52
Now wash your soba noodles. Stick your hands in the cold water, grab handfuls of noodles, and rub. Fairly aggressively. In a noodle-loving way. You're washing off the excess starch, and thus preventing a gummy pile of noodles.
How to Cook Soba Noodles, from Food52
Drain again in the colander, let them sit for a minute to let additional water drip off, and then proceed with your recipe. You can use them cold -- try them dressed in a cold noodle salad or bundled into little nests for dipping into sauce -- or you can warm them back up. Just give them a quick dunk in hot water or add to a soup right before serving.
We consider the one-bowl wash to be the happy medium of soba noodle prep. In Japanese Farm Food, Nancy Singleton Hachisu shares that her Japanese husband uses two bowls of cold water for a double-dip. On the other hand, when pressed for time, we’ve been known to just wash the noodles in the colander (after draining them) with lots of cold water running over them. Both methods are less likely to impress Mother Earth, so stick with the middle ground.
Photos by James Ransom

The simple substitution of Tamari for soy sauce makes this peanut sauce gluten-free friendly. With some brown rice noodles in the cupboard, you can throw this dish together in less time than it takes to call for take out. 


Makes 1 cup


  • 1inch peeled, fresh ginger
  • 1clove garlic
  • 1tablespoon honey
  • 1teaspoon Sriracha
  • 1/2cup smooth peanut butter
  • 1/4cup gluten-free tamari
  • 1tablespoon rice vinegar
  • 1tablespoon toasted sesame oil
  • Scallions, for garnish
  1. In a small food processor or blender, combine all the ingredients and purée until coarsely combined. Add 1/4 cup warm water and purée until smooth. Add more water as necessary so the peanut sauce is similar to the consistency of ranch dressing.
  2. Garnish with scallions and serve alongside shrimp or chicken skewers, as a topping for a rice bowl, or tossed together with noodles. Extra sauce can be stored in an airtight container for up to 2 weeks.

Mason Jar Salads


From Earthbound Farm


You Must Go in Order
First, you want to put in your salad dressing. When it's sitting at the bottom of your jar, it can't make the rest of your salad soggy. Then, put in a healthy grain or protein—something that will serve the dual purpose of guarding the more delicate salad ingredients from the dressing and also soaking up some of the dressing's flavor (so it's that much yummier). Then, put in the rest of your toppings, finishing off with your leafy greens. That way they won't get smushed and they'll be at the bottom when you pour everything onto a plate or into a bowl at lunchtime.


Combine Textures and Flavors
The most satisfying salads contain a filling protein, something salty, something crunchy, something sweet, and something tangy. Example: edamame (a protein) with roasted squash (subtly sweet), tomato vinaigrette (tangy), and sunflower seeds (salty and crunchy!). 

Cook Your Veggies First
Just because it's a salad doesn't mean everything in it has to be raw. If you've already roasted veggies for dinner one night, use some of the leftovers to top the salad you pack for lunch the next day—it'll make your meal so much more flavorful, and you'll likely find you need less dressing since you probably used some oil during the cooking process. If you're feeling really fancy, you can even try roasting fruits (FYI, roasted grapes might just be our favorite salad topping ever).
Want more fun salad combo ideas? Check out this oh-so-helpful infographic from Earthbound Farm:


Easy Teriyaki Chicken

From Full Thyme Student.


Total time: 15 minutes
Prep time: 5 minutes
Cook time: 10 minutes
Yield: 4 servings
Level: Easy
Ingredients:
3/4 cup low-sodium soy sauce (recommended: Kikkoman brand)
1/4 cup light brown sugar, packed
1 tablespoon rice wine vinegar (substitutes: lemon juice)
1 tablespoon grated ginger
2 garlic cloves, minced
2 boneless skinless chicken breasts
Freshly ground black pepper
2 teaspoons vegetable oil
Optional: 2 teaspoons water
Optional: 1 teaspoon corn starch
2 green onions, green and white parts, sliced
Serving suggestion: Steamed white or brown rice
Directions:
In a medium bowl, whisk together soy sauce, brown sugar, rice wine vinegar, grated ginger, and garlic until sugar is dissolved. Set aside.
Place chicken breasts on a cutting board, smooth side facing up, and place a layer of plastic wrap on top. Using a meat mallet or frying pan, evenly pound chicken breasts to a 1/2-inch thickness. Cut each breast in half to end up with 4 equal-sized pieces of chicken. Sprinkle 1/4 teaspoon of black pepper over top of chicken pieces.
Heat oil in a large pan over medium-high heat. Place the seasoned side of chicken pieces into the oil, and season the sides now facing up with another 1/4 teaspoon of black pepper. Cook first side of chicken for 3-4 minutes, or just until golden brown. Using tongs, flip the chicken over and cook other side for about 30 seconds. Pour prepared teriyaki sauce mixture evenly over chicken, and without moving chicken pieces, allow chicken to absorb sauce for 3 minutes as the sauce begins to gently bubble. Check chicken for doneness (meat should be opaque and no pinkness should remain in center) and transfer chicken pieces to a plate. To finish teriyaki sauce: If you do not have corn starch or if you prefer a thin teriyaki sauce, you can heat the sauce for another 3-5 minutes to reduce and gently thicken sauce.
If you prefer a thicker teriyaki sauce, in a small bowl, whisk together water and cornstarch. While whisking sauce, pour cornstarch mixture into teriyaki sauce and allow sauce to thicken, about 30 seconds. Remove from heat.
Pour teriyaki sauce over chicken pieces and serve over steamed rice. Serve with additional teriyaki sauce and garnish with sliced green onions. Slice chicken before serving, if desired.

Building flavor with cooking bases

From Chicago Tribune.

You don't need to know how to pronounce mirepoix or suppengruen. You just need to know that a mouthwatering dish, no matter what the cuisine, no matter what the regional influence, is built upon a great flavor base.
Such mixtures of chopped vegetables play a crucial role in many stews, braises, soups and sauces. In France, it may be carrots, onions and celery for a mirepoix. In Italy, the ingredients may be similar (or not) for a soffritto. Same is true in Spain and Latin America, where peppers might show up in their version, spelled sofrito. In Germany, leek or celeriac may be part of a suppengruen. And if you ask Cajuns about making etouffee or gumbo, expect them to cite the importance of the holy trinity of onion, celery and sweet peppers.
"There are a lot of dishes that are the same except for changes to the base," says Jack Bishop, editorial director for America's Test Kitchen. "If you are making a Provencal seafood stew, and you're using leeks and adding some saffron, you end up with something very different than if you've got carrot, celery and onion in the base.
"Hungarian. North African. Spanish. There are a lot of similarities in how you go about building those things," he adds, "(but) you're using harissa in one cuisine and paprika in another. In one, bay leaf makes sense."
How can a bunch of chopped-up vegetables be so important? "Those changes often give as much personality to the final dish as the sort of more apparent things," Bishop says.
Shrimp and mussels in a seafood stew or melt-in-your-mouth beef in a braise may shine as the stars of a favorite dish. But it's the savvy cook who understands that it's those vegetables, strategically combined and carefully cooked, that are key to the flavor of the finished dish.


That there are so many flavor bases is not surprising when you factor in regional influences, ingredients availability and cooking methods.
At America's Test Kitchen outside Boston, home to TV shows and cookbooks, the vegetables used in flavor bases are simply called aromatics or aromatic vegetables. Bishop divides those into two camps: "subtle flavor boosters" and "in-your-face flavor boosters." How those ingredients are cooked and when they are added to the pot involves a two-step process that softens them and coaxes out flavor "because part of the job of these things is to disappear largely."
Subtle flavor boosters are the "slow-cooking things that go in at the beginning … that can really cook for a while. Everything in the onion family, leeks, different types of onions, (plus) carrots, celery, bell peppers," Bishop says. "They're sturdy enough that they can be sauteed without risk of burning, or they can be sweated."


When they are sauteed over moderate heat, you'll get "a bit of flavor from browning as well as the concentrating, the release of the juices and the breaking down of the cell walls."
If you put a lid on the pan, you'll sweat them: "You're really concentrating the flavors but not adding any of the flavors that come from browning."
Bishop also adds a little salt early on. "Salt is going to help in the breaking down, cushioning a little bit against burning because you're going to get a little bit of liquid coming out the vegetables, plus it's going to help with the early seasoning."
Once the subtle aromatics are cooked, the in-your-face flavor boosters — i.e., garlic, ginger, tomato paste — are added.
"These are, in some ways, more prone to burning and scorching," he says. "It's also the best time to add ground spices." Adding spices to hot fat allows them to bloom, releasing some of their flavor compounds. Since many spice compounds are soluble in fat rather than water, it's important to add them to the pot before adding liquids like broth or wine.
All these bases are best cooked at medium or medium-low, Bishop says. So be patient. If you pump up the heat to rush the process, you'll burn your base.
Once you've built a great flavor base, then you can add your own signature. For as our Cajun friend notes, after you've built that flavor base: "Then I want to taste your kitchen."
Now it's your turn. Oh, and if you're wondering, mirepoix is pronounced meer-PWAH.
3 to get you started
Flavor bases vary by country and region, but here are some basic formulas.
Mirepoix: Combine equal parts finely diced carrot, onion and celery. Cook gently in butter. After several minutes, add thyme. Cook until vegetables are tender, not browned.
Soffritto: Combine equal parts finely chopped onion, carrot and celery (or fennel). Cook gently in olive oil. When onion's translucent, add some finely minced garlic. Cook until garlic is golden.
Sofrito: Combine equal parts finely chopped onion and bell pepper. Cook gently in olive oil. Add finely minced garlic and, depending on the dish, tomatoes.
Keys to building flavor
From Jack Bishop, editorial director for America's Test Kitchen.
Do stir: "Don't just throw everything in and walk away. You don't have to stir constantly, but give it an occasional stir. Be ready to adjust the heat if you feel it's going too slowly or too quickly."
Don't toss everything in at once: "Think about things that really are going to benefit from more time and those that are going to benefit with less time in the pot."
Take care: "Be careful with the carrots and the celery. Celery can get very grassy and a little bitter. That can be a good thing depending on what else is coming, or it can be a bit much. And carrots can get very, very sweet." That's OK if there's some heat or acidity for balance.
Saute or sweat: Depends on the dish. "The flavor's different. You've got a sort of more pure vegetable without all those sort of Maillard reactions, browning, caramelization. … Or maybe the dish is lacking if you don't brown those vegetables. It depends on what is coming later."
Size matters: Similarly sized pieces (of onion, carrot, celery, leek) will cook in about the same time. "You don't want to put in 1-inch pieces of celery and grated onion at the same time — that's probably not going to work."
Put the bases to use
A good example of the two-step process of building flavor involves a classic beef stew from America's Test Kitchen. Once the meat is browned and out of the pot, building the flavor base begins: "It starts with onions and carrots, which are left a fairly decent size. They go into the pot first," says Jack Bishop, editorial director for America's Test Kitchen. Garlic, anchovies and tomato paste follow in the second step.
The role of the onion-carrot flavor base that goes in at the very beginning, he notes, is very different from that of the pearl onions and peas that go in at the very end.


Consider the roles that subtle and in-your-face aromatics play in flavor bases in a recipe for braised cod peperonata from "Cooking for Two" (America's Test Kitchen). Two skinless cod fillets (or halibut, tilapia, monkfish or sea bass) are patted dry, then salted and peppered. Then the cook's attention moves to the flavor base: Red bell pepper strips, thinly sliced onion, paprika, salt and olive oil are cooked 8 to 10 minutes to soften and brown. A couple of minced garlic cloves and fresh thyme are added, plus some canned diced tomatoes, drained, and white wine. When the mixture simmers, the fillets are nestled in the pan, sauce spooned over, heat reduced to medium-low and the fish cooked until it flakes. Chopped fresh basil and sherry vinegar finishes it.


Bishop's culinary twists? Change the onions to leeks, omitting the peppers and upping the leeks. He'd add saffron rather than paprika, and in the second stage add some orange zest with the thyme (or change to bay leaf). "You would have a Provencal dish."
Copyright © 2014, Chicago Tribune
From FussylittleBlog

Different cuisines have their signature combination of aromatic vegetables.
In Italy a soffrito is usually onions, garlic and celery or carrot.
In Spain a sofrito is onions, green pepper and garlic.
In France a mirepoix is carrots, onions and celery.
In New Orleans the holy trinity is green peppers, onions and celery.
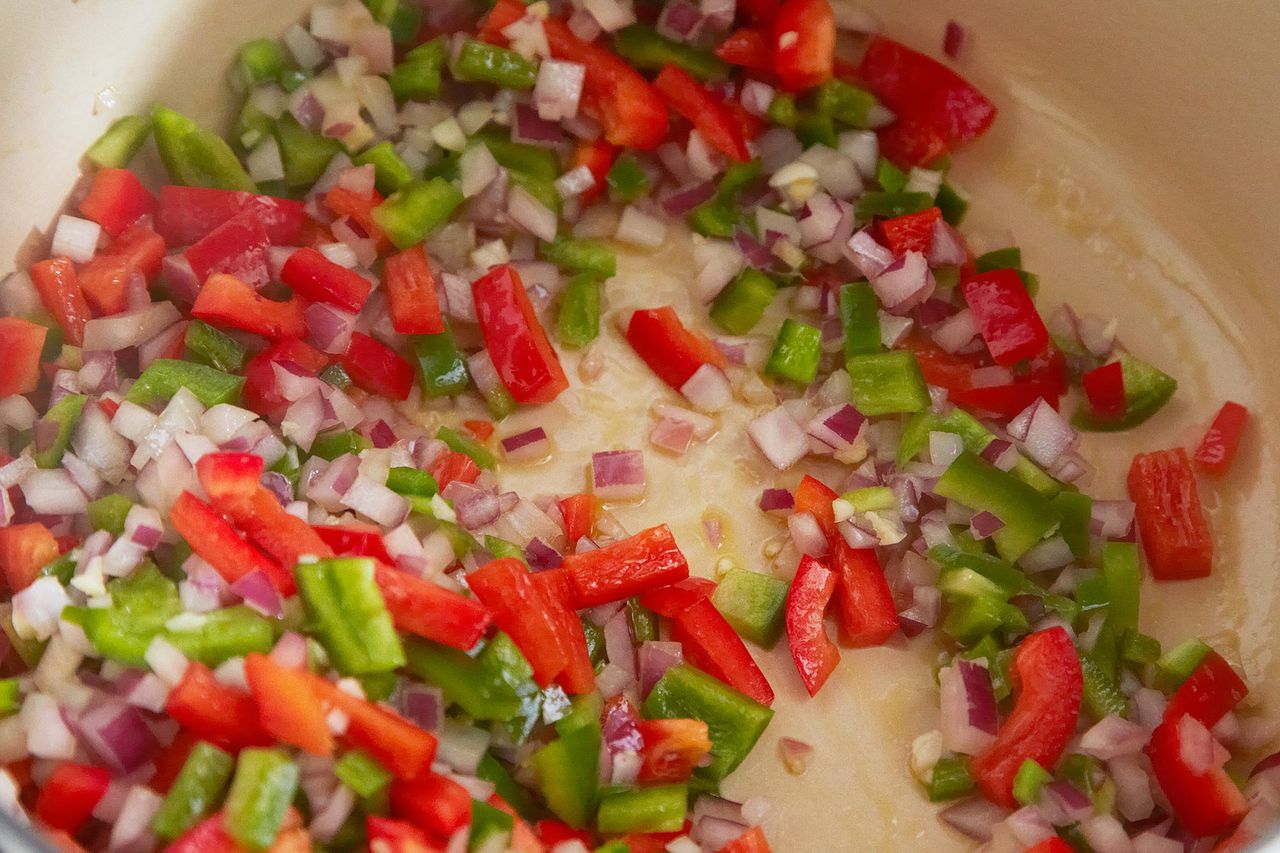
First you heat the oil. Okay, really first you heat the pan. Then when the pan is hot, you add the oil, and when the oil is hot, then you add the aromatic vegetables. Marcella argues for adding them one at a time depending upon their cooking times. In her world, onions go first, followed by garlic, and then the celery or carrot. An attempt to cook all the aromatics simultaneously would result in either undercooked onions (they would fail to reach their translucent stage) or overcooked garlic (picking up a golden color and assertive flavor that would dominate the final dish).
I should also mention here that it is critical to salt as you go.
Salt helps break down the cellular walls of your vegetables, which allows their flavors to meld. Without salt you won’t have a soffrito but rather just some sautéed vegetables. Remember, salt doesn’t just make things salty. Salt helps the natural flavors of your food come through. It’s over-salting food that makes it taste salty. You have to keep tasting your food as you cook to keep your salt level in check.
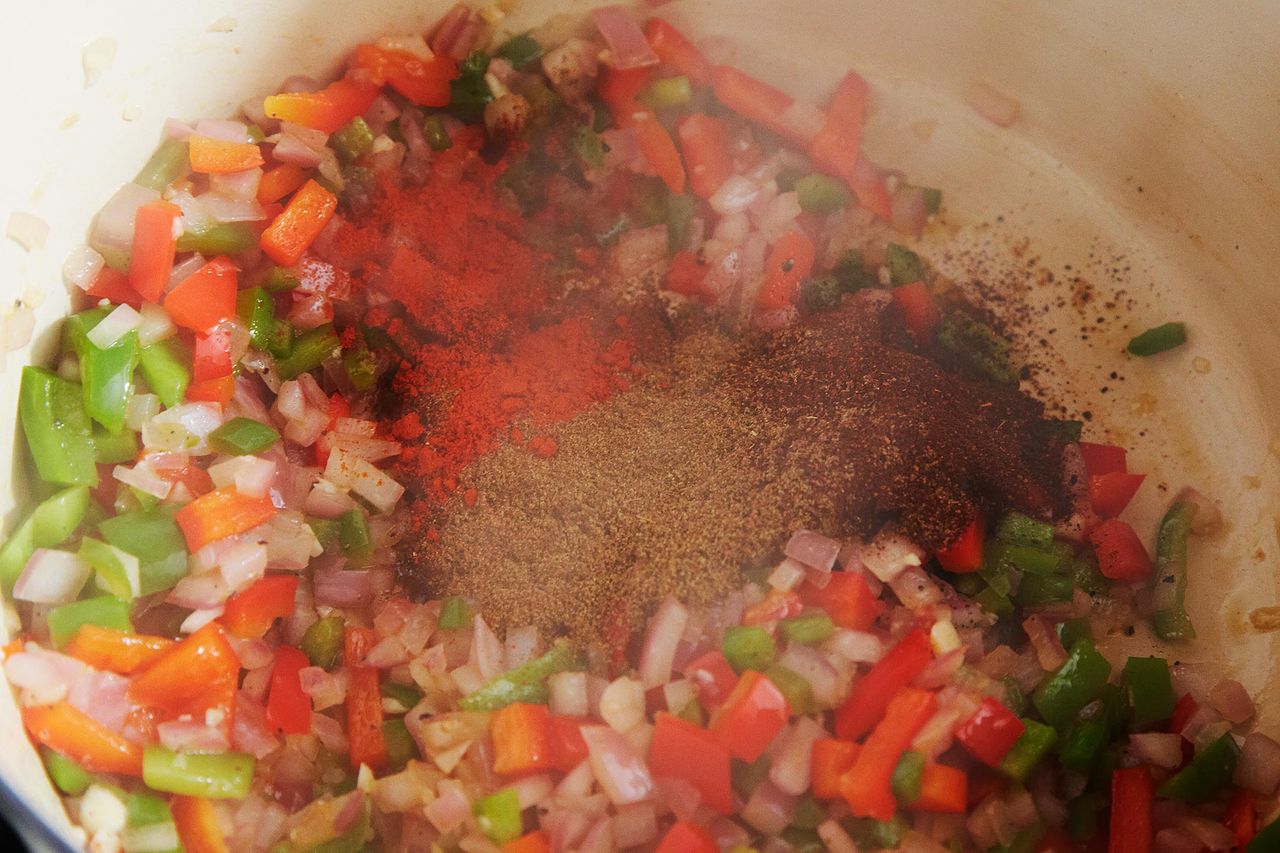
Congratulations, your aromatics are softened and you have a flavor base! Now let’s build. Find some ground spices (coriander, cumin, paprika, black pepper, cinnamon, ginger, etc.) and hearty dried herbs (rosemary, oregano, marjoram, etc.) that sound appealing to you. Delicate dried herbs  like basil and parsley and their fresh counterparts will have to wait their turn. Create your custom spice blend and cook it into the flavor base over medium-high to high heat. You’ll smell those spices becoming more aromatic, and when your soup is done the spices won’t taste raw. Instead of having soup with spices in it, you’ll have made a deeply flavored soup.
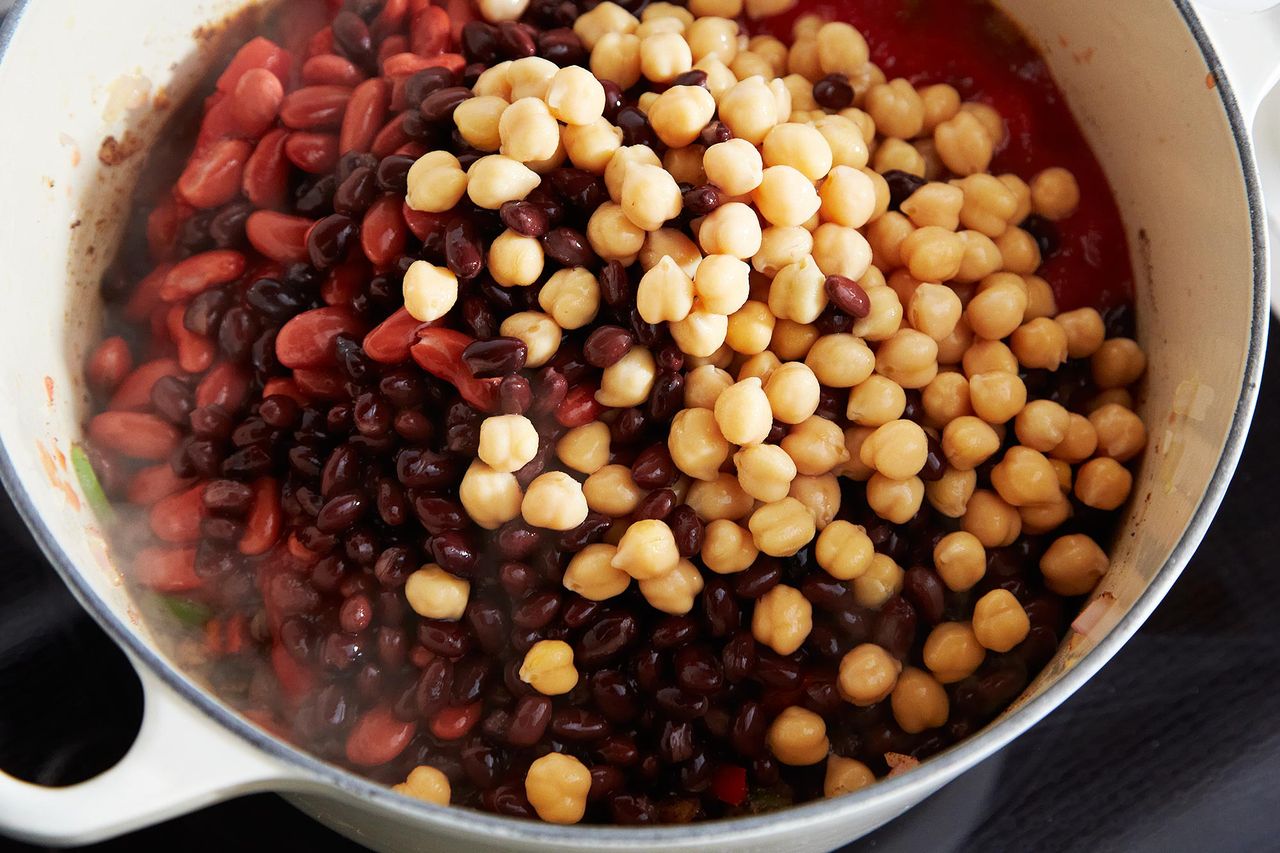
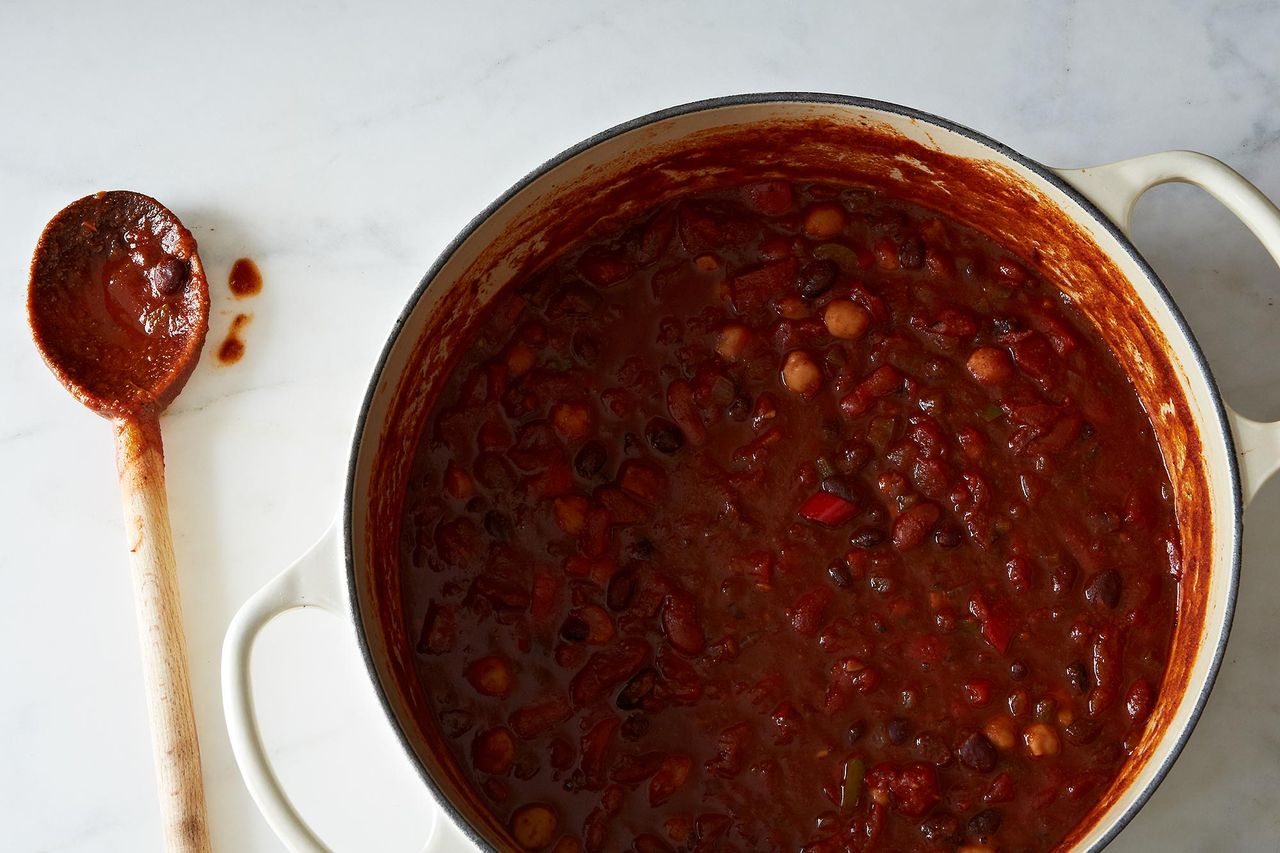
Now what kind of soup is it? Take the hearty main ingredient, be it beans, carrots, potatoes, or winter squash, and add it to the flavor base and mix it up. While the pot is on the heat, and before putting any liquid in the pot, make sure your main ingredient gets slathered in a layer of your well-spiced flavor base.
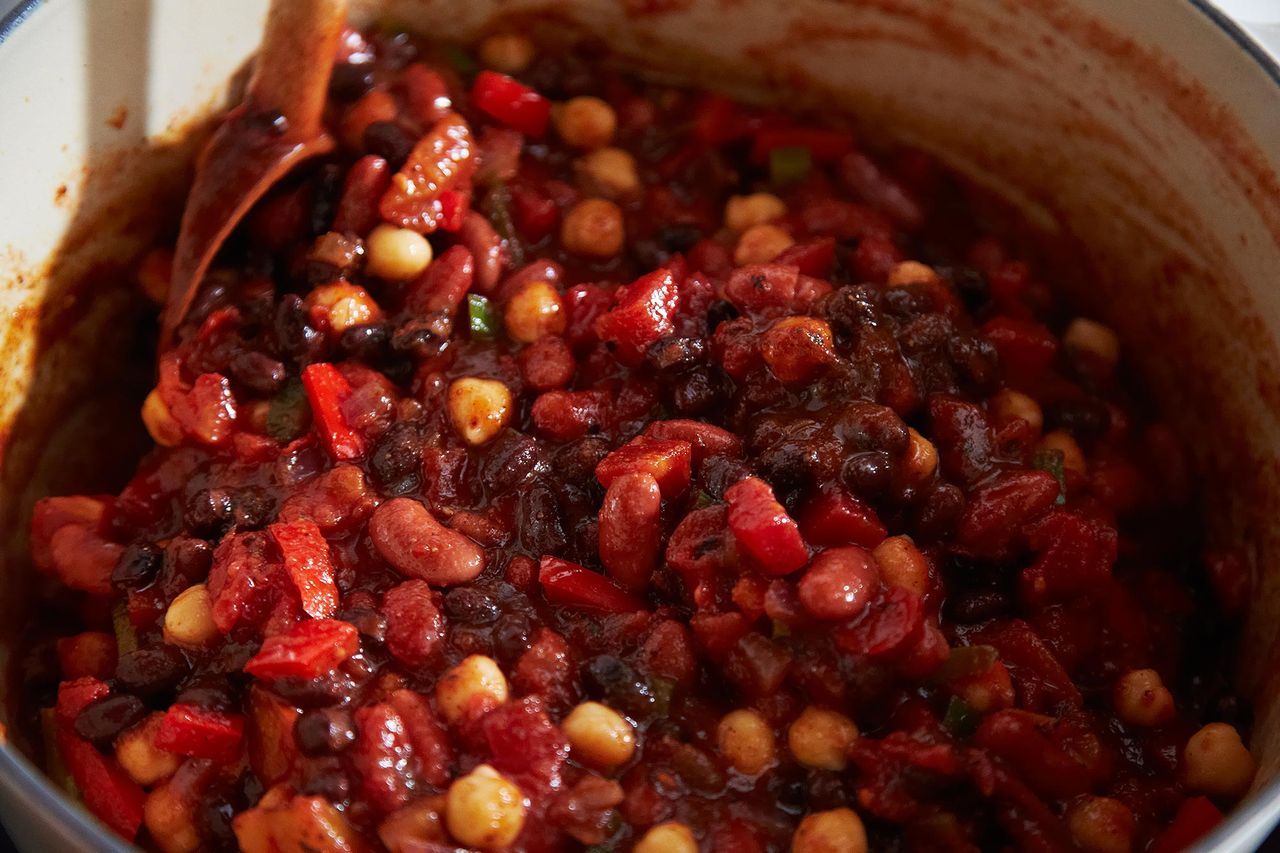
Finally it’s time to add the liquid, bring to a boil and then lower the heat to a simmer. Mind you, the liquid can be water, broth or stock. You can add a rind of Parmigiano-Reggiano, a ham hock, a bay leaf, or even some roasted veal bones for added flavor.
More delicate ingredients like parsley, celery, basil, spinach, or cilantro come in at the very end, otherwise they will end up tasting stewed and slimy.
Leave the soup chunky and brothy, put a couple of cups in a blender and return them to the pot to add some body, or puree the whole thing until it’s silky smooth. Enrich the soup with some cream or a can of coconut milk if you like. Just remember before you serve your creation to taste it and add more salt and pepper if needed.
Now marvel at the depth of flavor in the bowl before you.
It’s not much harder than just throwing stuff in a pot. It just takes a bit more mindfulness. But it pays off. I promise.