Saturday, October 12, 2013

Slow-Cooked Beans


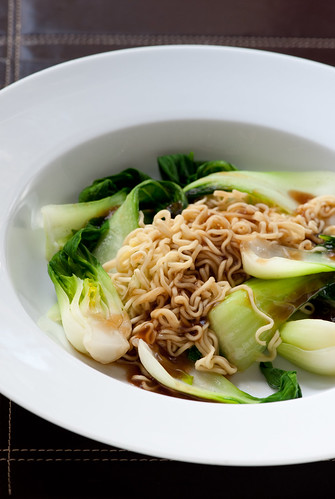
By cooking your own dried beans, you save money, reduce sodium and get better flavor along with, surprisingly, more vitamins and minerals. If you can't use the whole batch, freeze surplus cooked beans for later use in soups, salads and dips. The range of time for cooking beans is wide and varies with the age and the type of beans selected.


  • 1 pound (2cups) dried beans, such as cannellini beans, black beans, kidney beans, black-eyed peas, great northern beans or pinto beans
  • 1 onion, chopped
  • 4 cloves garlic, minced
  • 6 sprigs fresh thyme, or 1 teaspoon dried
  • 1 bay leaf
  • 5 cups boiling water
  • 1/2 teaspoon salt

  1. Soak beans in enough cold water to cover them by 2 inches for 6 hours or overnight. (Alternatively, use the quick-soak method: Place beans in a large pot with enough water to cover by 2 inches. Bring to a boil over high heat. Remove from heat and let stand for 1 hour.)
  2. Drain the beans and place them in a slow cooker. Add onion, garlic, thyme and bay leaf. Pour in boiling water. Cook, covered, on high until beans are tender, 2 to 3 1/2 hours. Add salt, cover, and cook for 15 minutes more.

NUTRITION


Per cup: 260 calories; 1 g fat ( 0 g sat , 0 g mono ); 0 mg cholesterol; 48 g carbohydrates; 0 g added sugars; 15 g protein; 19 g fiber; 201 mg sodium; 726 mg potassium.
Nutrition Bonus: Folate (61% daily value), Iron (25% dv), Magnesium (24% dv), Potassium (21% dv), Calcium (15% dv).
Carbohydrate Servings: 2 1/2
Exchanges: 3 starch
From Eating Well.

Korean-Inspired Black-eyed Peas and Kale Bowl


Korean Black-eyed Peas and Kale BowlFrom Fat-Free Vegan Kitchen.

Similar to bibimbap, this dish is a collection of separately-prepared ingredients served over rice. While it’s delicious with just the black-eyed peas and kale, I suggest adding a third component, such as the bean sprouts salad, shown, or Korean-Style Cucumber Salad.

Ingredients

BLACK-EYED PEAS
  • 1.5 cups dried black-eyed peas, picked over and rinsed
  • 5 cups water
  • 1 tablespoon chopped ginger root or ginger paste
  • 1 tablespoon chopped garlic
  • 1/2 teaspoon salt, optional
  • 2 tablespoons water
  • 2 teaspoons chopped ginger root
  • 2 cloves garlic, minced
  • 1 tablespoon soy sauce, tamari, or coconut aminos
  • 1/4 teaspoon Korean red pepper flakes (gochugaru) or red pepper flakes, to taste
KALE
  • 1 small onion, chopped
  • 1/2 red bell pepper, chopped
  • 1 clove garlic cloves, minced
  • 1 large bunch (12-16 ounces) kale, stems removed and leaves chopped
  • 1/4 cup water
  • 1 tablespoon soy sauce, tamari, or coconut aminos
  • brown rice, to serve

Instructions

  1. Pre-Cook the Blackeyed Peas: Combine the black-eyed peas, 5 cups water, 1 tbsp. ginger, 1 tbsp. garlic, and 1/2 tsp. salt in a pressure cooker or large pot. For pressure cooking, seal the cooker and bring to high pressure. Cook at high pressure for 10 minutes; then allow the pressure to come down naturally for 10 minutes before releasing the pressure. For regular cooking, use 6 cups of water. Cover and simmer until peas are tender (60-90 minutes), adding more water if necessary.
  2. Drain the cooked peas, reserving 1 cup of liquid. Heat 2 tablespoons of water in a medium-sized non-stick saucepan. Add the 2 teaspoons chopped ginger root and 2 cloves of garlic. Cook for 2 minutes. Add the drained peas, 1/3 cup of their cooking liquid, 1 tbsp. soy sauce (or tamari), and red pepper to taste. Simmer uncovered for 20-30 minutes, as you prepare the kale. Add additional cooking liquid if the peas get too dry.
  3. Kale: Heat a deep, non-stick skillet. Add the chopped onion and cook until it begins to brown, adding a little water as necessary to prevent sticking. Add the red bell pepper and garlic and cook for another minute. Stir in the kale and 1/4 cup water and quickly cover. Steam until the kale is tender but still bright green, 3-6 minutes. Remove from heat and stir in the soy sauce (tamari).
  4. Place a serving of rice into each bowl. Arrange the black-eyed peas on one side of the rice and kale on the other. Serve with hot sauce, such as Sriracha or the Gochuchang sauce in the notes below.

Notes

I served this with a simple hot sauce based on Korean red pepper paste (gochuchang). Mix 1 1/2 tbsp. gochuchang, 1 1/2 tbsp. hot water, 1 tsp. sugar, and 1/4 teaspoon sesame oil in a small bowl. This makes a lightly spicy sauce that most people will not find too hot.
Easy Hint: You can use 2 cans of black-eyed peas, rinsed and drained, instead of cooking dried peas. Simply begin with step 2, use water instead of cooking liquid, and increase the amounts of ginger and garlic, as desired.
Gluten-Free and Soy-Free? Make this using coconut aminos instead of soy sauce.
Preparation time: 20 minute(s) | Cooking time: 1 hour(s) 10 minute(s)
Number of servings (yield): 6
Nutrition (per serving, without rice or sauce): 186 calories, 8 calories from fat, 1gtotal fat, 0mg cholesterol, 432.9mg sodium, 793.2mg potassium, 34.4g carbohydrates, 6.2g fiber, 4.1g sugar, 12.5g protein.

Black Bean and Chorizo Chili


We’re not sure whether it’s the chorizo sausage, cinnamon, or semisweet chocolate that gives this chili its secret ingredient, but reviewers agree on one thing -- it tastes spectacular. This black bean chili recipe gets a kick from chorizo sausage and smoky chipotle chiles.

  • (7-ounce) can chipotle chiles in adobo sauce
  • Cooking spray
  • 2 1/2 cups chopped onion, divided
  • 1 1/2 cups chopped green bell pepper 
  • 1 1/2 cups chopped red bell pepper 
  • garlic cloves, minced
  • links Spanish chorizo sausage, diced (about 6 1/2 ounces) 
  • 1 1/2 tablespoons chili powder
  • 1 tablespoon ground cumin
  • 1 1/2 teaspoons dried oregano
  • 1 tablespoon fresh lime juice
  • 1/8 teaspoon ground cinnamon
  • (15-ounce) cans black beans, drained
  • (14-ounce) cans whole peeled tomatoes, undrained and chopped
  • (8 1/2-ounce) can no-salt-added whole-kernel corn, drained
  • 1 1/2 ounces semisweet chocolate, chopped
  • 3/4 teaspoon salt
  • 1/2 teaspoon black pepper
  • 3/4 cup fat-free sour cream
  • Baked tortilla chips (optional)
  1. Remove 2 chiles from can; finely chop, reserving remaining chiles and sauce for another use.
  2. Heat a large Dutch oven coated with cooking spray over medium-high heat. Add chiles, 1 3/4 cups onion, bell peppers, garlic, and chorizo; sauté 5 minutes or until tender. Add chili powder and next 7 ingredients (chili powder through corn), stirring to combine. Bring to a boil. Reduce heat, and simmer, covered, 30 minutes, stirring occasionally. Remove from heat; stir in chocolate, salt, and black pepper.
  3. Ladle 1 cup chili into each of 12 bowls. Top each serving with 1 tablespoon sour cream and 1 tablespoon onion. Serve with tortilla chips.

Cavatappi (Macaroni) with Chorizo and Black Beans


Cavatappi with Chorizo and Black BeansThe full, earthy Tex-Mex flavors of chorizo, black beans and chili blend perfectly, if somewhat unexpectedly, with corkscrew-shaped macaroni.

  1. 3 tablespoons cooking oil
  2. 1 onion, sliced thin
  3. 2 cloves garlic, chopped
  4. 1/2 teaspoon dried oregano
  5. 3/4 teaspoon chili powder
  6. 1/2 pound cured chorizo or other spicy hard sausage such as pepperoni, casings removed and sausage cut into thin slices
  7. 1 tablespoon tomato paste
  8. 1 cup canned low-sodium chicken broth or homemade stock
  9. 1 cup canned black beans, drained and rinsed
  10. 1 tablespoon lime juice
  11. 1 teaspoon salt
  12. 1/2 pound cavatappi
  13. 1/3 cup chopped fresh parsley
  1. In a large frying pan, heat the oil over moderately low heat. Add the onion and sauté until it begins to soften, about 3 minutes. Stir in the garlic, oregano, and chili powder and cook, stirring, for 2 minutes.
  2. Add the chorizo, tomato paste, and broth to the pan and stir. Bring to a simmer and cook, stirring occasionally, until slightly thickened, about 3 minutes. Add the black beans, the lime juice, and the salt and remove the pan from the heat.
  3. In a large pot of boiling, salted water, cook the cavatappi until just done, about 13 minutes. Drain; toss with the sauce and parsley.
NOTES
Test-Kitchen Tips
• For firm canned black beans rather than the usual mushy, overprocessed specimens, we prefer the Goya brand.
• If you use tomato paste in small quantities, consider buying a tube of one of the imported Italian brands. The tube lasts a long time in the refrigerator, just like anchovy paste, so you won't have to open a whole can for one or two tablespoons.
From Food and Wine: Christmas with a Spanish Accent

Chicken Spaghetti Casserole


This chicken spaghetti casserole is low and calories and can easily be made ahead. The recipe makes two casseroles so enjoy one for dinner and freeze the other for later. To prepare the frozen casserole, cover and bake for 55 minutes at 350°; uncover and bake an additional 10 minutes or until hot and bubbly.

Yield: 2 casseroles, 4 servings each (serving size: about 1 cup)


  • 2 cups chopped cooked chicken breast $
  • 2 cups uncooked spaghetti noodles, broken into 2-inch pieces (about 7 ounces) $
  • 1 cup (1/4-inch-thick) slices celery $
  • 1 cup chopped red bell pepper $
  • 1 cup chopped onion
  • 1 cup fat-free, less-sodium chicken broth $
  • 1/2 teaspoon salt
  • 1/4 teaspoon freshly ground black pepper
  • (10.75-ounce) cans condensed 30% reduced-sodium 98% fat-free cream of mushroom soup, undiluted
  • Cooking spray
  • 1 cup (4 ounces) shredded cheddar cheese, divided $
  1. 1. Preheat oven to 350°.
  2. 2. Combine first 5 ingredients in a large bowl. Combine broth, salt, pepper, and soup in a medium bowl, stirring with a whisk. Add soup mixture to chicken mixture; toss. Divide mixture evenly between 2 (8-inch) square or (2-quart) baking dishes coated with cooking spray. Sprinkle 1/2 cup cheese over each casserole. Cover with foil coated with cooking spray. Bake at 350° for 35 minutes. Uncover and bake an additional 10 minutes.

Chicken Enchilada Casserole


This Tex-Mex chicken enchilada casserole is a delicious dinner option when you're craving Southwestern-style comfort food. 

  • Cooking spray
  • bone-in chicken thighs, skinned
  • 1/3 cup chopped fresh cilantro, divided
  • 1 cup frozen corn kernels, thawed
  • 1/3 cup (3 ounces) 1/3-less-fat cream cheese, softened
  • 1/2 teaspoon ground red pepper
  • 1/2 teaspoon ground cumin
  • 1/4 teaspoon kosher salt
  • 1/4 teaspoon black pepper
  • 2 cups chopped onion, divided
  • garlic cloves, minced and divided
  • 1 cup fat-free, lower-sodium chicken broth 
  • 2/3 cup salsa verde
  • 1/4 cup water
  • 2 tablespoons chopped pickled jalapeño pepper
  • (6-inch) corn tortillas
  • 1/4 cup (1 ounce) shredded sharp cheddar cheese 
  1. 1. Preheat oven to 425°.
  2. 2. Heat a large ovenproof skillet over medium-high heat. Coat pan with cooking spray. Add chicken to pan; sauté 4 minutes on each side. Place skillet in oven; bake at 425° for 10 minutes or until done. Remove chicken from pan; let stand 15 minutes. Remove meat from bones; shred. Discard bones. Place chicken in a medium bowl. Add 1 1/2 tablespoons cilantro, corn, and next 5 ingredients (through black pepper) to chicken; toss to combine.
  3. 3. Return pan to medium-high heat. Add 1/2 cup onion; sauté 5 minutes, stirring occasionally. Add 3 garlic cloves; sauté 30 seconds, stirring constantly. Add onion mixture to chicken mixture; stir to combine.
  4. 4. Combine remaining 1 1/2 cups onion, remaining 3 garlic cloves, broth, salsa, 1/4 cup water, and jalapeño in a medium saucepan over medium-high heat; bring to a boil. Reduce heat, and simmer 15 minutes, stirring occasionally. Remove from heat; let stand 10 minutes. Carefully pour mixture into a blender; add 2 tablespoons cilantro. Process until smooth.
  5. 5. Heat a large skillet over medium-high heat. Add 2 tortillas; cook 1 1/2 minutes on each side. Remove tortillas from pan; repeat procedure with remaining tortillas. Cut tortillas into quarters.
  6. 6. Spread 1/2 cup salsa mixture in the bottom of an 8-inch square glass or ceramic baking dish coated with cooking spray. Arrange 12 tortilla quarters over salsa mixture. Spoon half of chicken mixture over tortillas. Repeat layers, ending with tortillas. Pour remaining salsa mixture over tortillas; sprinkle evenly with cheddar cheese. Bake at 425° for 15 minutes or until bubbly and lightly browned. Top with remaining cilantro.

5-Ingredient Cookbook

Link to 5-ingredient recipes.

Slow Cooker Recipes

Link to 105 Slow Cooker Favorites from Cooking Light.

Veggie Laksa


From StoneSoup
salad & noodles-5
veggie laksa
serves 3
Laksa is a wonderful coconut milk based noodle soup that hails from Malaysia. These days you can get commercial laska or other Thai curry pastes that take all the hard work out of it.
I’ve used Singapore noodles in this recipe which are a fine version of fresh hokkien noodles but I have eaten laksa with rice noodles and even a combination of the two so feel free to substitute.
I’ve cheated a little on the 5 ingredient rule by including ‘mixed chopped vegetables’ as a single ingredient. I actually used a carrot, a zucchini and a red pepper, all cut into little batons. Chicken laksa is also really popular. Prawn or shrimps are lovely cooked in the spicy fragrant coconut broth.
3/4lb (350g) fresh Singapore noodles
2oz (60g) Laksa paste or other Thai curry paste
1 large can (1 1/2 cups) coconut cream
2 cups mixed chopped vegetables (see note above)
handful fresh basil leaves
Place noodles in a heatproof bowl and cover with boiling water. Allow to stand for 1 minute then massage to loosen into individual strands. Drain.
Meanwhile heat 2 tablespoons of peanut or other vegetable oil in a large saucepan over high heat. Add curry paste and stir fry for 30 seconds. Quickly add coconut cream and 2 cups boiling water. Bring to the boil and add vegetables. Simmer for 2 minutes or until vegetables are cooked to your liking.
To serve, divide noodles between 3 bowls. Pour over soup and vegetables and top with basil leaves.

Japanese (Udon) Noodle Soup with Spinach


serves 2
Udon noodles a lovely fat white Japanese wheat noodles. I’m still not sure how they can be all soft and fresh looking but come in packs that don’t need refrigerating. Noodle magic?
They are brilliant to have on hand for a quick meal. Just add in some some soy sauce lemon and baby spinach for a deeply satisfying nutritious dinner.
1 chicken breast, finely sliced into ribbons
2 tablespoons soy sauce
1 packet udon noodles (7oz or 200g)
1 packet baby spinach leaves or 1 small bunch english spinach
lemon juice
Bring 2 cups water to the boil in a medium saucepan. Add chicken and simmer for 1-2 minutes or until cooked. Scoop out chicken with a slotted spoon and divide between 2 bowls.
Return broth to the heat and add noodles, soy and spinach. Stir to break up the noodles and let the spinach wilt. You might need to add the spinach in batches. Don’t worry it will fit in as it wilts.
Add 1 tablespoon lemon juice, stir and taste. Keep adding lemon until it tastes fresh and zesty. Pour soup over the chicken and serve hot.

2-Minute Noodles with Bok choy & Oyster sauce


5 Ingredients. 5 Minutes. 5 Meals. – Simple Noodles

Post written by jules from stonesoup | minimalist home cooking. Follow her onTwitter.
I love pasta.
Simple, comforting, versatile and inexpensive it’s easy to see why it’s on high rotation in most family dinner repetoires. But sometimes pasta can get a little boring week after week. Which is when I look to Asia and the wonderful of world of noodles for inspiration to freshen things up.
From fresh hokkien noodles, to dried rice sticks to soft Japanese udon noodles. There are so many options to choose from. And they’re fast. No need to boil for 10 minutes or more like pasta, just pour over some boiling water, soak for a few minutes and serve.
I know the thing that holds me back from cooking Asian food is the long ingredient lists and the thought of having to buy a whole heap of different sauces that I’m only going to use every now and then. So I’ve tried to keep things simple. To cook all 5 dishes you’ll only need three sauces – soy, fish and oyster. If you haven’t cooked Asian before I’d urge you to at least invest in a bottle of soy sauce and start from there.
So why not surprise the family with some noodle fun?
japanese noodle soup with spinach
serves 2
Udon noodles a lovely fat white Japanese wheat noodles. I’m still not sure how they can be all soft and fresh looking but come in packs that don’t need refrigerating. Noodle magic?
They are brilliant to have on hand for a quick meal. Just add in some some soy sauce lemon and baby spinach for a deeply satisfying nutritious dinner.
1 chicken breast, finely sliced into ribbons
2 tablespoons soy sauce
1 packet udon noodles (7oz or 200g)
1 packet baby spinach leaves or 1 small bunch english spinach
lemon juice
Bring 2 cups water to the boil in a medium saucepan. Add chicken and simmer for 1-2 minutes or until cooked. Scoop out chicken with a slotted spoon and divide between 2 bowls.
Return broth to the heat and add noodles, soy and spinach. Stir to break up the noodles and let the spinach wilt. You might need to add the spinach in batches. Don’t worry it will fit in as it wilts.
Add 1 tablespoon lemon juice, stir and taste. Keep adding lemon until it tastes fresh and zesty. Pour soup over the chicken and serve hot.
salad & noodles-3
2 minute noodles with bok choy & oyster sauce
serves 2
If the thought of using 2 minute noodles disturbs you, by all means try another noodle but I was pleasantly surprised how lovely they were with the fresh greens and the savoury sauce.
If you can’t find bok choy, any other asian greens would work or you could just use a big bunch of English spinach.
1 packet 2 minute noodles – chicken flavour
1 bunch baby bok choy, separated into individual leaves
1/3 cup oyster sauce
1 teaspoon sesame oil
Place about 2 cups water in a medium saucepan and add the flavour sachet from the noodles and bring to the boil. Add bok choy and noodles and simmer for 2 minutes until noodles are cooked and the bok choy is wilted. Drain and return to the pan. Stir through oyster sauce and oil and serve hot.

Rosemary Focaccia

From Cook's Illustrated.

WHY THIS RECIPE WORKS:
The key to our focaccia recipe was using a “preferment” that gave us the benefits of fermentation with minimal effort. This mixture of flour, water, and yeast rests until its yeast flavor gets stronger and more complex than it would get by simply adding yeast to flour and water and kneading. Using an almost no-knead mixing method gently combined the ingredients of our focaccia recipe without developing too much gluten. To skip the long rest this mixing method calls for, we allowed the freshly mixed dough to rest briefly before we added salt, then gently turned the dough over itself at regular intervals as it proofed. Finally, moving our free-form breads into round cake pans and drizzling the bottom of the pans in oil gave us a focaccia recipe that turned out bread with a crackly crisp bottom and airy interior. 

MAKES TWO 9-INCH ROUND LOAVES
If you don’t have a baking stone, bake the bread on an overturned, preheated rimmed baking sheet set on the upper-middle oven rack. The bread can be kept for up to 2 days well wrapped at room temperature or frozen for 2 months wrapped in foil and placed in a zipper-lock bag.

INGREDIENTS

INSTRUCTIONS

  1. 1. FOR THE BIGA: Combine flour, water, and yeast in large bowl and stir with wooden spoon until uniform mass forms and no dry flour remains, about 1 minute. Cover bowl tightly with plastic wrap and let stand at room temperature (about 70 degrees) overnight (at least 8 hours and up to 24 hours.) Use immediately or store in refrigerator for up to 3 days (allow to stand at room temperature 30 minutes before proceeding with recipe.)
  2. 2. FOR THE DOUGH: Stir flour, water, and yeast into biga with wooden spoon until uniform mass forms and no dry flour remains, about 1 minute. Cover with plastic wrap and let rise at room temperature for 15 minutes.
  3. 3. Sprinkle 2 teaspoons salt over dough; stir into dough until thoroughly incorporated, about 1 minute. Cover with plastic wrap and let rise at room temperature 30 minutes. Spray rubber spatula or bowl scraper with nonstick cooking spray; fold partially risen dough over itself by gently lifting and folding edge of dough toward middle. Turn bowl 90 degrees; fold again. Turn bowl and fold dough 6 more times (total of 8 turns). Cover with plastic wrap and let rise for 30 minutes. Repeat folding, turning, and rising 2 more times, for total of three 30-minute rises. Meanwhile, adjust oven rack to upper-middle position, place baking stone on rack, and heat oven to 500 degrees at least 30 minutes before baking.
  4. 4. Gently transfer dough to lightly floured counter. Lightly dust top of dough with flour and divide in half. Shape each piece of dough into 5-inch round by gently tucking under edges. Coat two 9-inch round cake pans with 2 tablespoons olive oil each. Sprinkle each pan with ½ teaspoon kosher salt. Place round of dough in pan, top side down; slide dough around pan to coat bottom and sides, then flip over. Repeat with second piece of dough. Cover pans with plastic wrap and let rest for 5 minutes.
  5. 5. Using fingertips, press dough out toward edges of pan. (If dough resists stretching, let it relax for 5 to 10 minutes before trying again.) Using dinner fork, poke surface of dough 25 to 30 times, popping any large bubbles. Sprinkle rosemary evenly over top of dough. Let dough rest until slightly bubbly, 5 to 10 minutes.
  6. 6. Place pans on baking stone and reduce oven temperature to 450 degrees. Bake until tops are golden brown, 25 to 28 minutes, switching placement of pans halfway through baking. Transfer pans to wire rack and let cool 5 minutes. Remove loaves from pan and return to wire rack. Brush tops with any oil remaining in pan. Let cool 30 minutes before serving.

TECHNIQUE

FOR BIG FLAVOR, A LONG REST IS BEST
Creating a small batch of starter dough (also known as a preferment, or a biga in Italian) boosts the flavor in our bread dramatically. A starter is made by combining small amounts of flour and water with a little yeast and allowing it to ferment overnight. With a lengthy rest, long carbohydrate chains that have little taste break down into a multitude of sugars and alcohol with lots of flavor.
    HOLD THE SALT—TEMPORARILY
    Instead of relying on kneading to develop gluten, our dough uses a resting process called autolysis. During this long resting period (which usually lasts several hours), enzymes in the wheat cut long, balled-up strands of gluten into smaller pieces, which then unravel and link together to form larger, well-developed gluten networks. Could adjusting when we added salt to the dough help speed things along?
    THE EXPERIMENT
    We prepared two doughs. In the first, we combined the flour, water, yeast, and salt with the biga all at once before resting; in the second, we withheld the salt for 15 minutes.
    THE RESULTS
    Briefly omitting the salt hastened gluten development by an hour. After just 15 minutes, the unsalted dough was already pliant and smooth, while the salted dough was still gluey and stiff.
    THE EXPLANATION
    Salt inhibits both the ability of flour to absorb water and the activity of the enzymes that break down proteins to begin the process of forming gluten. If allowed to rest without salt, the flour is able to get a jump on gluten development by absorbing as much water as it can and letting its enzymes work sooner to develop gluten networks.

  • Saturday, October 05, 2013

    Marcella Hazan’s Tomato Sauce


    2 cups tomatoes, with their juices (for example, a 28-ounce can of San Marzano whole peeled tomatoes)
    5 tablespoons butter
    1 onion, peeled and cut in half
    salt
    1. Combine the tomatoes, their juices, the butter and the onion halves in a saucepan. Add a pinch or two of salt.
    2. Place over medium heat and bring to a simmer. Cook, uncovered, for about 45 minutes. Stir occasionally, mashing any large pieces of tomato with a spoon. Add salt as needed.
    3. Discard the onion before tossing the sauce with pasta. This recipe makes enough sauce for a pound of pasta.

    Yield:
    Adapted from “Spoon Fed” by Kim Severson

    Bolognese Meat Sauce


    1 tablespoon vegetable oil
    3 tablespoons butter plus 1 tablespoon for tossing the pasta
    1/2 cup chopped onion
    2/3 cup chopped celery
    2/3 cup chopped carrot
    3/4 pound ground beef chuck (or you can use 1 part pork to 2 parts beef)
    Salt
    Black pepper, ground fresh from the mill
    1 cup whole milk
    Whole nutmeg
    1 cup dry white wine
    1 1/2 cups canned imported Italian plum tomatoes, cut up, with their juice
    1 1/4 to 1 1/2 pounds pasta
    Freshly grated parmigiano-reggiano cheese at the table

    1. Put the oil, butter and chopped onion in the pot and turn the heat on to medium. Cook and stir the onion until it has become translucent, then add the chopped celery and carrot. Cook for about 2 minutes, stirring vegetables to coat them well.
    2. Add ground beef, a large pinch of salt and a few grindings of pepper. Crumble the meat with a fork, stir well and cook until the beef has lost its raw, red color.
    3. Add milk and let it simmer gently, stirring frequently, until it has bubbled away completely. Add a tiny grating -- about 1/8 teaspoon -- of nutmeg, and stir.
    4. Add the wine, let it simmer until it has evaporated, then add the tomatoes and stir thoroughly to coat all ingredients well. When the tomatoes begin to bubble, turn the heat down so that the sauce cooks at the laziest of simmers, with just an intermittent bubble breaking through to the surface. Cook, uncovered, for 3 hours or more, stirring from time to time. While the sauce is cooking, you are likely to find that it begins to dry out and the fat separates from the meat. To keep it from sticking, add 1/2 cup of water whenever necessary. At the end, however, no water at all must be left and the fat must separate from the sauce. Taste and correct for salt.
    5. Toss with cooked drained pasta, adding the tablespoon of butter, and serve with freshly grated Parmesan on the side.

    Yield: 2 heaping cups, for about 6 servings and 1 1/2 pounds pasta

    Adapted from "Essentials of Classic Italian Cooking" by Marcella Hazan (Knopf)

    Roast Chicken With Lemons


    3- to 4-pound chicken
    Salt
    Black pepper, ground fresh from the mill
    2 rather small lemons

    1. Preheat oven to 350 degrees.
    2. Wash the chicken thoroughly in cold water, both inside and out. Remove all the bits of fat hanging loose. Let the bird sit for about 10 minutes on a slightly tilted plate to let all the water drain out of it. Pat it thoroughly dry all over with cloth or paper towels.
    3. Sprinkle a generous amount of salt and black pepper on the chicken, rubbing it with your fingers over all its body and into its cavity.
    4. Wash the lemons in cold water and dry them with a towel. Soften each lemon by placing it on a counter and rolling it back and forth as you put firm downward pressure on it with the palm of your hand. Puncture the lemons in at least 20 places each, using a sturdy round toothpick, a trussing needle, a sharp-pointed fork, or similar implement.
    5. Place both lemons in the bird's cavity. Close up the opening with toothpicks or with trussing needle and string. Close it well, but don't make an absolutely airtight job of it because the chicken may burst. Run kitchen string from one leg to the other, tying it at both knuckle ends. Leave the legs in their natural position without pulling them tight. If the skin is unbroken, the chicken will puff up as it cooks, and the string serves only to keep the thighs from spreading apart and splitting the skin.
    6. Put the chicken into a roasting pan, breast facing down. Do not add cooking fat of any kind. This bird is self-basting, so you need not fear it will stick to the pan. Place it in the upper third of the preheated oven. After 30 minutes, turn the chicken over to have the breast face up. When turning it, try not to puncture the skin. If kept intact, the chicken will swell like a balloon, which makes for an arresting presentation at the table later. Do not worry too much about it, however, because even if it fails to swell, the flavor will not be affected.
    7. Cook for another 30 to 35 minutes, then turn the oven thermostat up to 400 degrees, and cook for an additional 20 minutes. Calculate between 20 and 25 minutes total cooking time for each pound. There is no need to turn the chicken again.
    8. Whether your bird has puffed up or not, bring it to the table whole and leave the lemons inside until it is carved and opened. The juices that run out are perfectly delicious. Be sure to spoon them over the chicken slices. The lemons will have shriveled up, but they still contain some juice; do not squeeze them, they may squirt.
    Yield: 4 servings

    Adapted from "Essentials of Classic Italian Cooking" by Marcella Hazan (Knopf)