Saturday, September 20, 2014

Soba with Peanut Sauce


From Food52.

If you’ve ever eagerly anticipated sneaking a bite from a bowl of perfectly-dressed soba noodles, and instead were left staring at a glob of tangled noodles at the end of your chopsticks, we feel your pain. And we’re here to make sure that never happens again.
The secret? You need to wash your noodles. Really. For some reason, most packages of soba noodles don’t tell you this -- but now you’re in on the secret, and no longer need to battle soba that's stuck together and gluey. While you run to your pantry to incredulously look at what's not there on the package, make sure your noodles are made from all (or mostly) buckwheat flour; if they aren’t, buy different ones the next time you’re at the store.
Here's how to cook them -- properly.
How to Cook Soba Noodles, from Food52
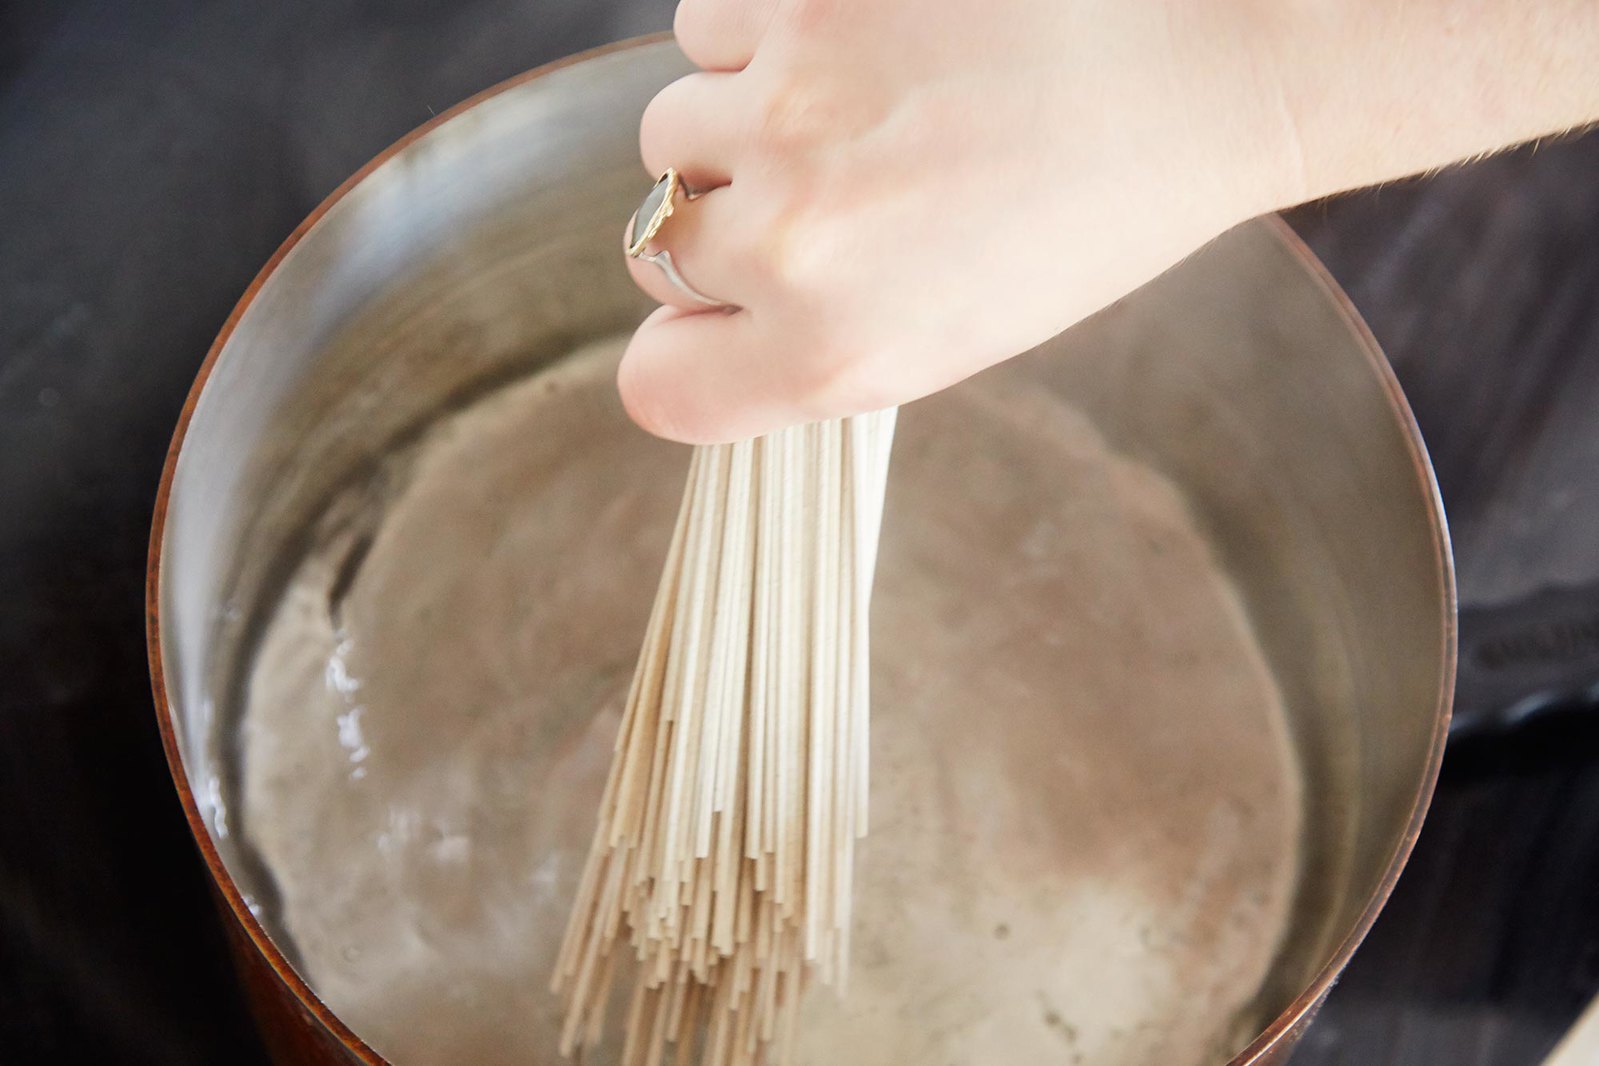
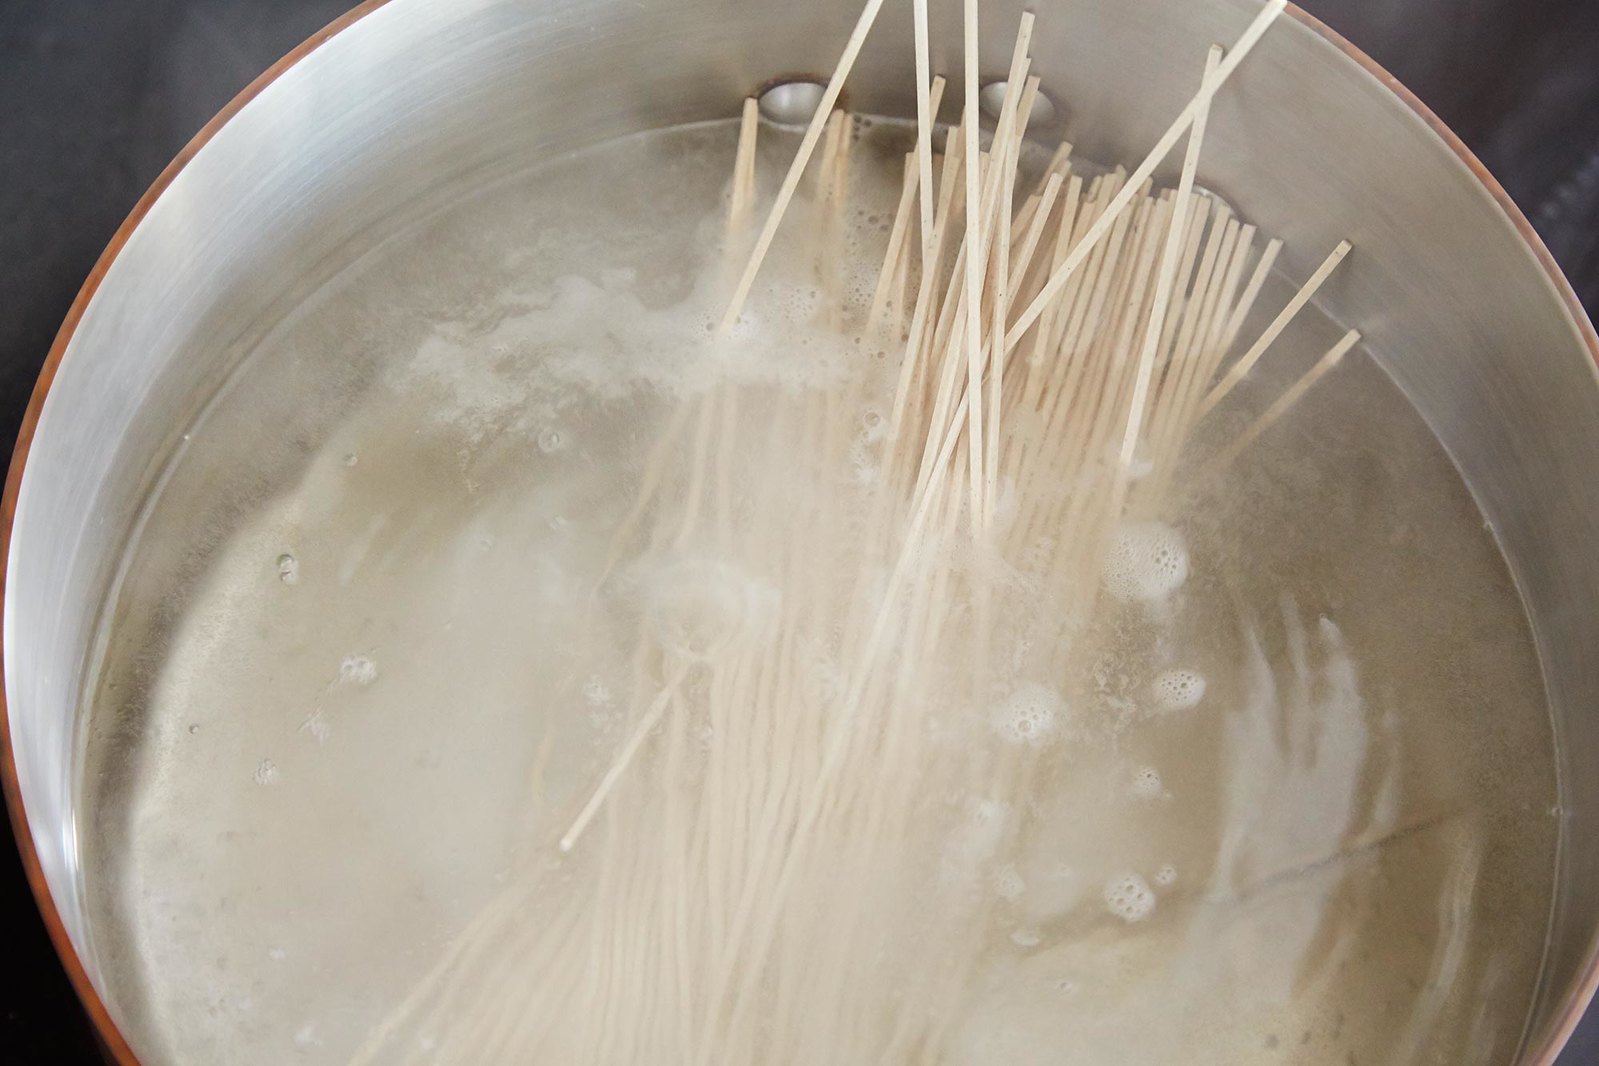
Get a big pot of water boiling -- and despite our prior yammering, don’t salt the water. Once it's boiling, add the soba noodles, and give them a quick stir to make sure they all go under water.
How to Cook Soba Noodles, from Food52
Let the water return to a boil, then reduce the heat a little, to keep the water at a simmer. Let the noodles cook for the time prescribed on your noodle package, probably between 5 and 8 minutes -- set that kitchen timer! Meanwhile, ready your colander in the sink, and prepare a big bowl of cold water. (Not an ice bath, though: You want it cold, but not so cold you can’t comfortably stick your hands in.)
More: Cooking with other types of noodles? Here are 3 ways to cook pasta.  
How to Cook Soba Noodles, from Food52
Pull out one noodle from the pot to check for doneness. Soba should not be al dente, it should be fully cooked -- but not cooked for so long that it is mushy. When the noodles are done, drain them into the waiting colander, and then promptly dump them into the bowl of cold water. 
How to Cook Soba Noodles, from Food52
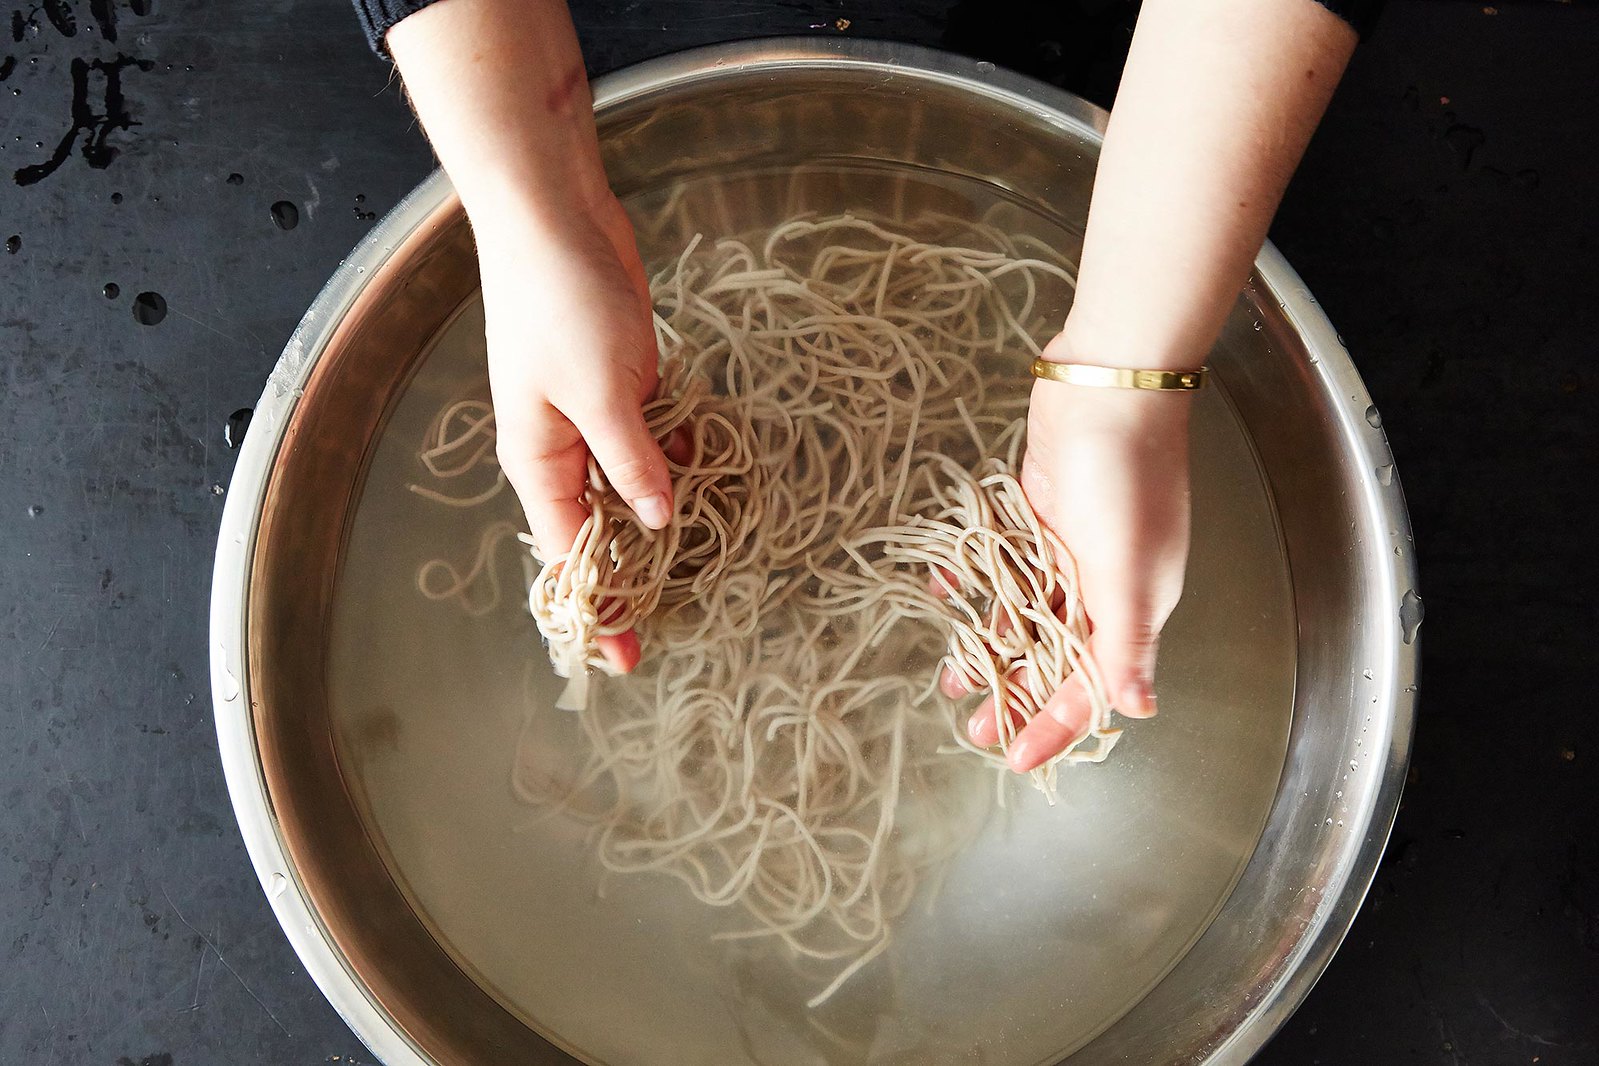
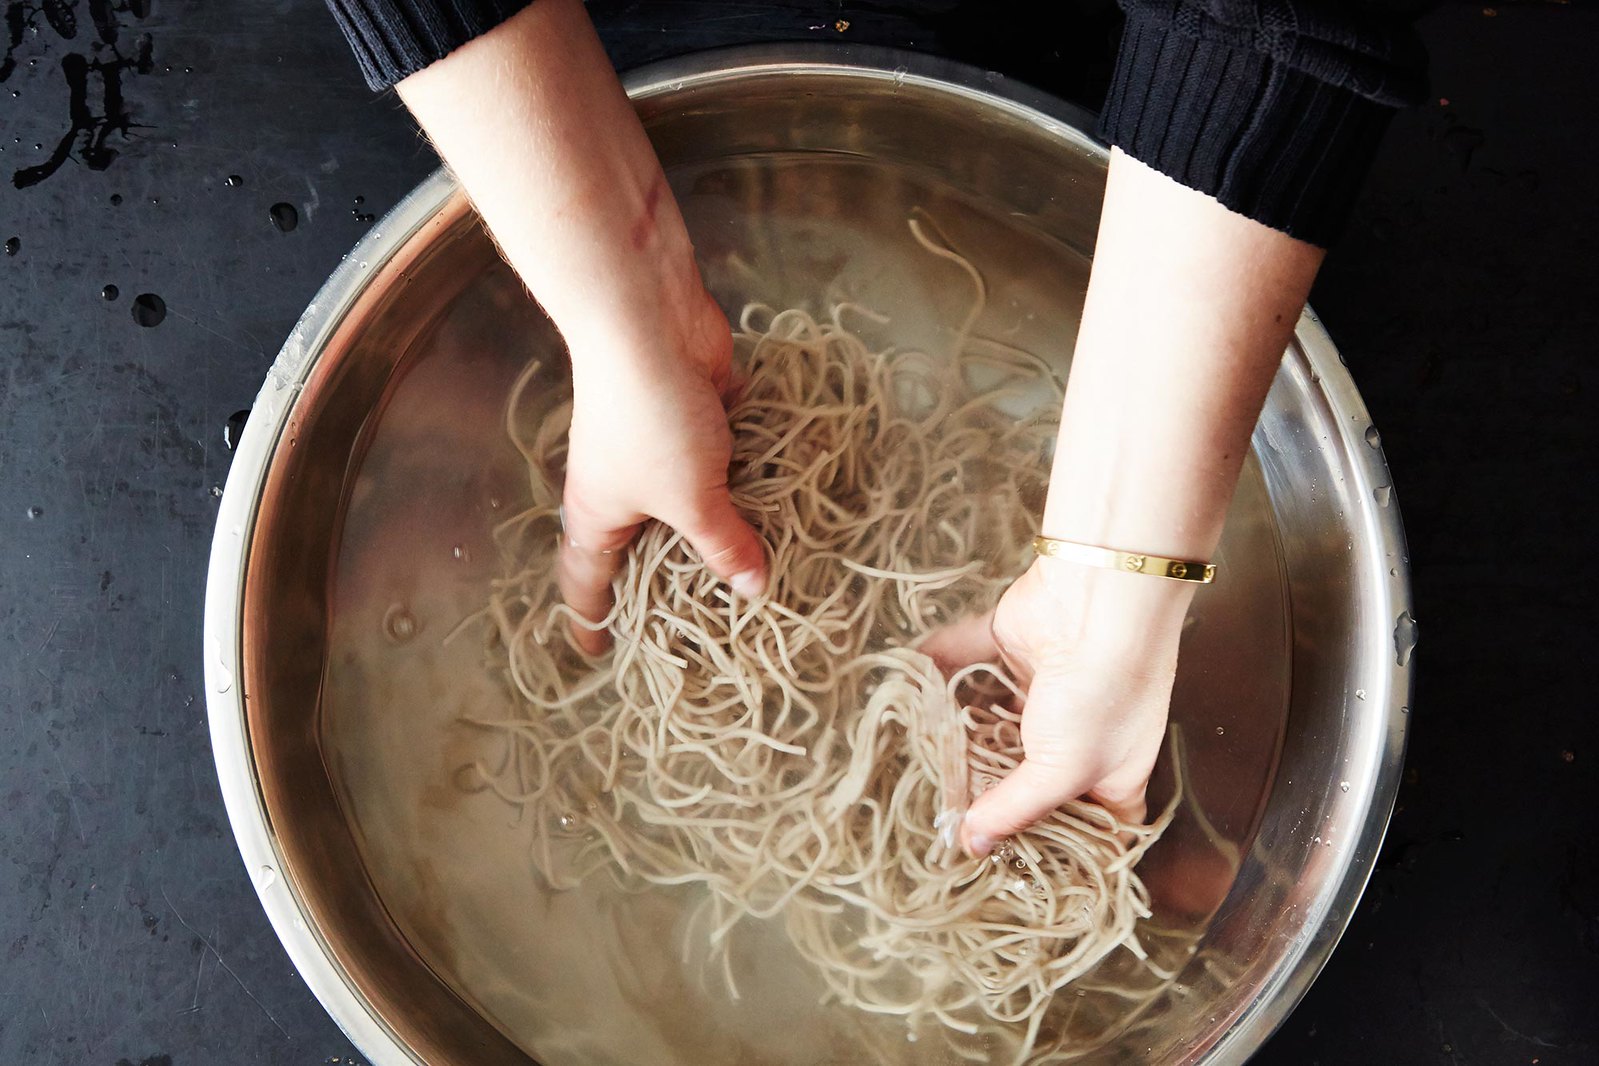
Now wash your soba noodles. Stick your hands in the cold water, grab handfuls of noodles, and rub. Fairly aggressively. In a noodle-loving way. You're washing off the excess starch, and thus preventing a gummy pile of noodles.
How to Cook Soba Noodles, from Food52
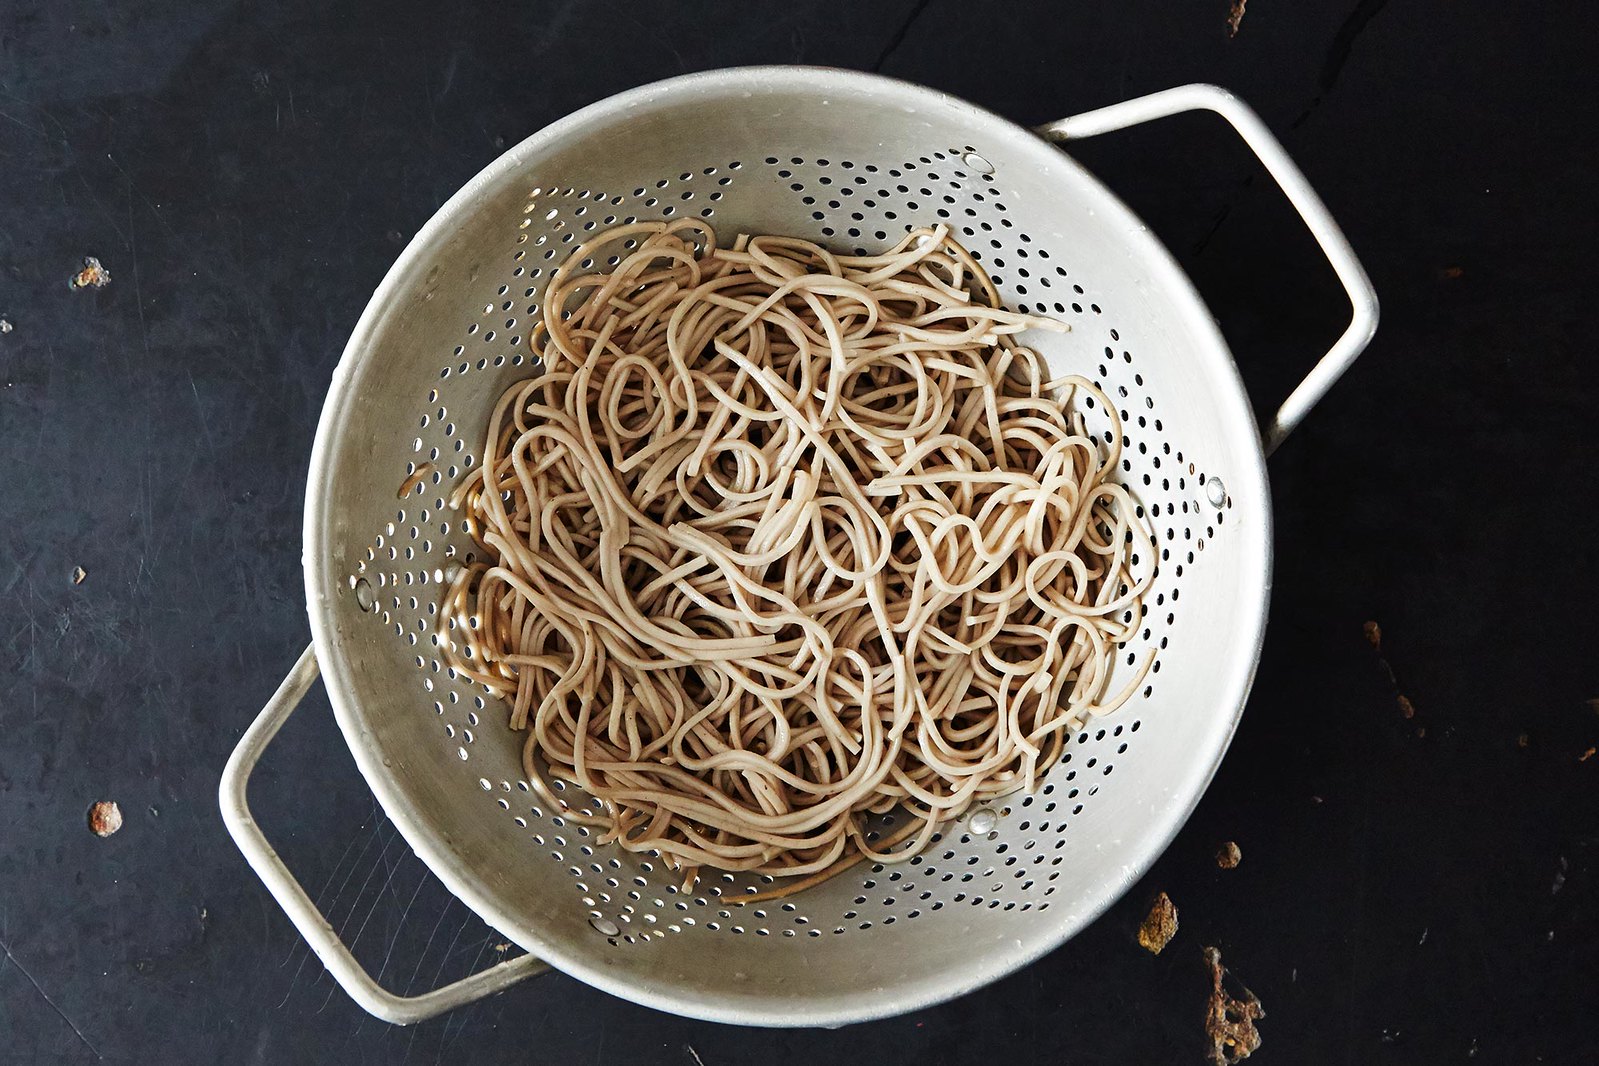
Drain again in the colander, let them sit for a minute to let additional water drip off, and then proceed with your recipe. You can use them cold -- try them dressed in a cold noodle salad or bundled into little nests for dipping into sauce -- or you can warm them back up. Just give them a quick dunk in hot water or add to a soup right before serving.
We consider the one-bowl wash to be the happy medium of soba noodle prep. In Japanese Farm Food, Nancy Singleton Hachisu shares that her Japanese husband uses two bowls of cold water for a double-dip. On the other hand, when pressed for time, we’ve been known to just wash the noodles in the colander (after draining them) with lots of cold water running over them. Both methods are less likely to impress Mother Earth, so stick with the middle ground.
Photos by James Ransom

The simple substitution of Tamari for soy sauce makes this peanut sauce gluten-free friendly. With some brown rice noodles in the cupboard, you can throw this dish together in less time than it takes to call for take out. 


Makes 1 cup


  • 1inch peeled, fresh ginger
  • 1clove garlic
  • 1tablespoon honey
  • 1teaspoon Sriracha
  • 1/2cup smooth peanut butter
  • 1/4cup gluten-free tamari
  • 1tablespoon rice vinegar
  • 1tablespoon toasted sesame oil
  • Scallions, for garnish
  1. In a small food processor or blender, combine all the ingredients and purée until coarsely combined. Add 1/4 cup warm water and purée until smooth. Add more water as necessary so the peanut sauce is similar to the consistency of ranch dressing.
  2. Garnish with scallions and serve alongside shrimp or chicken skewers, as a topping for a rice bowl, or tossed together with noodles. Extra sauce can be stored in an airtight container for up to 2 weeks.

Mason Jar Salads


From Earthbound Farm


You Must Go in Order
First, you want to put in your salad dressing. When it's sitting at the bottom of your jar, it can't make the rest of your salad soggy. Then, put in a healthy grain or protein—something that will serve the dual purpose of guarding the more delicate salad ingredients from the dressing and also soaking up some of the dressing's flavor (so it's that much yummier). Then, put in the rest of your toppings, finishing off with your leafy greens. That way they won't get smushed and they'll be at the bottom when you pour everything onto a plate or into a bowl at lunchtime.


Combine Textures and Flavors
The most satisfying salads contain a filling protein, something salty, something crunchy, something sweet, and something tangy. Example: edamame (a protein) with roasted squash (subtly sweet), tomato vinaigrette (tangy), and sunflower seeds (salty and crunchy!). 

Cook Your Veggies First
Just because it's a salad doesn't mean everything in it has to be raw. If you've already roasted veggies for dinner one night, use some of the leftovers to top the salad you pack for lunch the next day—it'll make your meal so much more flavorful, and you'll likely find you need less dressing since you probably used some oil during the cooking process. If you're feeling really fancy, you can even try roasting fruits (FYI, roasted grapes might just be our favorite salad topping ever).
Want more fun salad combo ideas? Check out this oh-so-helpful infographic from Earthbound Farm:


Easy Teriyaki Chicken

From Full Thyme Student.


Total time: 15 minutes
Prep time: 5 minutes
Cook time: 10 minutes
Yield: 4 servings
Level: Easy
Ingredients:
3/4 cup low-sodium soy sauce (recommended: Kikkoman brand)
1/4 cup light brown sugar, packed
1 tablespoon rice wine vinegar (substitutes: lemon juice)
1 tablespoon grated ginger
2 garlic cloves, minced
2 boneless skinless chicken breasts
Freshly ground black pepper
2 teaspoons vegetable oil
Optional: 2 teaspoons water
Optional: 1 teaspoon corn starch
2 green onions, green and white parts, sliced
Serving suggestion: Steamed white or brown rice
Directions:
In a medium bowl, whisk together soy sauce, brown sugar, rice wine vinegar, grated ginger, and garlic until sugar is dissolved. Set aside.
Place chicken breasts on a cutting board, smooth side facing up, and place a layer of plastic wrap on top. Using a meat mallet or frying pan, evenly pound chicken breasts to a 1/2-inch thickness. Cut each breast in half to end up with 4 equal-sized pieces of chicken. Sprinkle 1/4 teaspoon of black pepper over top of chicken pieces.
Heat oil in a large pan over medium-high heat. Place the seasoned side of chicken pieces into the oil, and season the sides now facing up with another 1/4 teaspoon of black pepper. Cook first side of chicken for 3-4 minutes, or just until golden brown. Using tongs, flip the chicken over and cook other side for about 30 seconds. Pour prepared teriyaki sauce mixture evenly over chicken, and without moving chicken pieces, allow chicken to absorb sauce for 3 minutes as the sauce begins to gently bubble. Check chicken for doneness (meat should be opaque and no pinkness should remain in center) and transfer chicken pieces to a plate. To finish teriyaki sauce: If you do not have corn starch or if you prefer a thin teriyaki sauce, you can heat the sauce for another 3-5 minutes to reduce and gently thicken sauce.
If you prefer a thicker teriyaki sauce, in a small bowl, whisk together water and cornstarch. While whisking sauce, pour cornstarch mixture into teriyaki sauce and allow sauce to thicken, about 30 seconds. Remove from heat.
Pour teriyaki sauce over chicken pieces and serve over steamed rice. Serve with additional teriyaki sauce and garnish with sliced green onions. Slice chicken before serving, if desired.

Building flavor with cooking bases

From Chicago Tribune.

You don't need to know how to pronounce mirepoix or suppengruen. You just need to know that a mouthwatering dish, no matter what the cuisine, no matter what the regional influence, is built upon a great flavor base.
Such mixtures of chopped vegetables play a crucial role in many stews, braises, soups and sauces. In France, it may be carrots, onions and celery for a mirepoix. In Italy, the ingredients may be similar (or not) for a soffritto. Same is true in Spain and Latin America, where peppers might show up in their version, spelled sofrito. In Germany, leek or celeriac may be part of a suppengruen. And if you ask Cajuns about making etouffee or gumbo, expect them to cite the importance of the holy trinity of onion, celery and sweet peppers.
"There are a lot of dishes that are the same except for changes to the base," says Jack Bishop, editorial director for America's Test Kitchen. "If you are making a Provencal seafood stew, and you're using leeks and adding some saffron, you end up with something very different than if you've got carrot, celery and onion in the base.
"Hungarian. North African. Spanish. There are a lot of similarities in how you go about building those things," he adds, "(but) you're using harissa in one cuisine and paprika in another. In one, bay leaf makes sense."
How can a bunch of chopped-up vegetables be so important? "Those changes often give as much personality to the final dish as the sort of more apparent things," Bishop says.
Shrimp and mussels in a seafood stew or melt-in-your-mouth beef in a braise may shine as the stars of a favorite dish. But it's the savvy cook who understands that it's those vegetables, strategically combined and carefully cooked, that are key to the flavor of the finished dish.


That there are so many flavor bases is not surprising when you factor in regional influences, ingredients availability and cooking methods.
At America's Test Kitchen outside Boston, home to TV shows and cookbooks, the vegetables used in flavor bases are simply called aromatics or aromatic vegetables. Bishop divides those into two camps: "subtle flavor boosters" and "in-your-face flavor boosters." How those ingredients are cooked and when they are added to the pot involves a two-step process that softens them and coaxes out flavor "because part of the job of these things is to disappear largely."
Subtle flavor boosters are the "slow-cooking things that go in at the beginning … that can really cook for a while. Everything in the onion family, leeks, different types of onions, (plus) carrots, celery, bell peppers," Bishop says. "They're sturdy enough that they can be sauteed without risk of burning, or they can be sweated."


When they are sauteed over moderate heat, you'll get "a bit of flavor from browning as well as the concentrating, the release of the juices and the breaking down of the cell walls."
If you put a lid on the pan, you'll sweat them: "You're really concentrating the flavors but not adding any of the flavors that come from browning."
Bishop also adds a little salt early on. "Salt is going to help in the breaking down, cushioning a little bit against burning because you're going to get a little bit of liquid coming out the vegetables, plus it's going to help with the early seasoning."
Once the subtle aromatics are cooked, the in-your-face flavor boosters — i.e., garlic, ginger, tomato paste — are added.
"These are, in some ways, more prone to burning and scorching," he says. "It's also the best time to add ground spices." Adding spices to hot fat allows them to bloom, releasing some of their flavor compounds. Since many spice compounds are soluble in fat rather than water, it's important to add them to the pot before adding liquids like broth or wine.
All these bases are best cooked at medium or medium-low, Bishop says. So be patient. If you pump up the heat to rush the process, you'll burn your base.
Once you've built a great flavor base, then you can add your own signature. For as our Cajun friend notes, after you've built that flavor base: "Then I want to taste your kitchen."
Now it's your turn. Oh, and if you're wondering, mirepoix is pronounced meer-PWAH.
3 to get you started
Flavor bases vary by country and region, but here are some basic formulas.
Mirepoix: Combine equal parts finely diced carrot, onion and celery. Cook gently in butter. After several minutes, add thyme. Cook until vegetables are tender, not browned.
Soffritto: Combine equal parts finely chopped onion, carrot and celery (or fennel). Cook gently in olive oil. When onion's translucent, add some finely minced garlic. Cook until garlic is golden.
Sofrito: Combine equal parts finely chopped onion and bell pepper. Cook gently in olive oil. Add finely minced garlic and, depending on the dish, tomatoes.
Keys to building flavor
From Jack Bishop, editorial director for America's Test Kitchen.
Do stir: "Don't just throw everything in and walk away. You don't have to stir constantly, but give it an occasional stir. Be ready to adjust the heat if you feel it's going too slowly or too quickly."
Don't toss everything in at once: "Think about things that really are going to benefit from more time and those that are going to benefit with less time in the pot."
Take care: "Be careful with the carrots and the celery. Celery can get very grassy and a little bitter. That can be a good thing depending on what else is coming, or it can be a bit much. And carrots can get very, very sweet." That's OK if there's some heat or acidity for balance.
Saute or sweat: Depends on the dish. "The flavor's different. You've got a sort of more pure vegetable without all those sort of Maillard reactions, browning, caramelization. … Or maybe the dish is lacking if you don't brown those vegetables. It depends on what is coming later."
Size matters: Similarly sized pieces (of onion, carrot, celery, leek) will cook in about the same time. "You don't want to put in 1-inch pieces of celery and grated onion at the same time — that's probably not going to work."
Put the bases to use
A good example of the two-step process of building flavor involves a classic beef stew from America's Test Kitchen. Once the meat is browned and out of the pot, building the flavor base begins: "It starts with onions and carrots, which are left a fairly decent size. They go into the pot first," says Jack Bishop, editorial director for America's Test Kitchen. Garlic, anchovies and tomato paste follow in the second step.
The role of the onion-carrot flavor base that goes in at the very beginning, he notes, is very different from that of the pearl onions and peas that go in at the very end.


Consider the roles that subtle and in-your-face aromatics play in flavor bases in a recipe for braised cod peperonata from "Cooking for Two" (America's Test Kitchen). Two skinless cod fillets (or halibut, tilapia, monkfish or sea bass) are patted dry, then salted and peppered. Then the cook's attention moves to the flavor base: Red bell pepper strips, thinly sliced onion, paprika, salt and olive oil are cooked 8 to 10 minutes to soften and brown. A couple of minced garlic cloves and fresh thyme are added, plus some canned diced tomatoes, drained, and white wine. When the mixture simmers, the fillets are nestled in the pan, sauce spooned over, heat reduced to medium-low and the fish cooked until it flakes. Chopped fresh basil and sherry vinegar finishes it.


Bishop's culinary twists? Change the onions to leeks, omitting the peppers and upping the leeks. He'd add saffron rather than paprika, and in the second stage add some orange zest with the thyme (or change to bay leaf). "You would have a Provencal dish."
Copyright © 2014, Chicago Tribune
From FussylittleBlog

Different cuisines have their signature combination of aromatic vegetables.
In Italy a soffrito is usually onions, garlic and celery or carrot.
In Spain a sofrito is onions, green pepper and garlic.
In France a mirepoix is carrots, onions and celery.
In New Orleans the holy trinity is green peppers, onions and celery.
First you heat the oil. Okay, really first you heat the pan. Then when the pan is hot, you add the oil, and when the oil is hot, then you add the aromatic vegetables. Marcella argues for adding them one at a time depending upon their cooking times. In her world, onions go first, followed by garlic, and then the celery or carrot. An attempt to cook all the aromatics simultaneously would result in either undercooked onions (they would fail to reach their translucent stage) or overcooked garlic (picking up a golden color and assertive flavor that would dominate the final dish).
I should also mention here that it is critical to salt as you go.
Salt helps break down the cellular walls of your vegetables, which allows their flavors to meld. Without salt you won’t have a soffrito but rather just some sautéed vegetables. Remember, salt doesn’t just make things salty. Salt helps the natural flavors of your food come through. It’s over-salting food that makes it taste salty. You have to keep tasting your food as you cook to keep your salt level in check.
Congratulations, your aromatics are softened and you have a flavor base! Now let’s build. Find some ground spices (coriander, cumin, paprika, black pepper, cinnamon, ginger, etc.) and hearty dried herbs (rosemary, oregano, marjoram, etc.) that sound appealing to you. Delicate dried herbs  like basil and parsley and their fresh counterparts will have to wait their turn. Create your custom spice blend and cook it into the flavor base over medium-high to high heat. You’ll smell those spices becoming more aromatic, and when your soup is done the spices won’t taste raw. Instead of having soup with spices in it, you’ll have made a deeply flavored soup.
Now what kind of soup is it? Take the hearty main ingredient, be it beans, carrots, potatoes, or winter squash, and add it to the flavor base and mix it up. While the pot is on the heat, and before putting any liquid in the pot, make sure your main ingredient gets slathered in a layer of your well-spiced flavor base.
Finally it’s time to add the liquid, bring to a boil and then lower the heat to a simmer. Mind you, the liquid can be water, broth or stock. You can add a rind of Parmigiano-Reggiano, a ham hock, a bay leaf, or even some roasted veal bones for added flavor.
More delicate ingredients like parsley, celery, basil, spinach, or cilantro come in at the very end, otherwise they will end up tasting stewed and slimy.
Leave the soup chunky and brothy, put a couple of cups in a blender and return them to the pot to add some body, or puree the whole thing until it’s silky smooth. Enrich the soup with some cream or a can of coconut milk if you like. Just remember before you serve your creation to taste it and add more salt and pepper if needed.
Now marvel at the depth of flavor in the bowl before you.
It’s not much harder than just throwing stuff in a pot. It just takes a bit more mindfulness. But it pays off. I promise.
Saturday, September 13, 2014

Office Lunch: Lentils and Chickpeas with Greens


A power lunch for grown-ups and kids alike.

  • ½ cup green lentils
  • 3 tablespoons olive oil, divided
  • ½ bunch greens, such as spinach, kale, or Swiss chard, bottom stems trimmed
  • Kosher salt, freshly ground pepper
  • 1 15-oz. can chickpeas, rinsed
  • 4 cherry tomatoes, halved or quartered if large
  • 1 tablespoon Parmesan or sharp cheddar, cut into small dice
  • 1 lemon, halved

  • Cook lentils in a medium pot of salted water until tender, 10–15 minutes; drain and let cool. Heat 1 Tbsp. oil in a medium skillet over medium-high heat. Add greens and cook, stirring occasionally, until wilted and bright green, about 3 minutes. Season with salt and pepper. Combine lentils, chickpeas, and remaining 2 Tbsp. olive oil in a medium bowl; season with salt and pepper. Divide among 2 bowls and top with greens, tomatoes, and Parmesan. Squeeze lemon over.

Office Lunch: Boiled Eggs & Cucumber


Hard-boiled eggs travel well and can be boiled in bulk at the beginning of the week. Make egg salad with the egg-stras!

2 eggs
  • 2 tablespoons butter or cream cheese, softened
  • 2 slices pumpernickel bread, cut in half
  • ¼ English cucumber, sliced in half lengthwise and cut into spears
  • Flaky sea salt, such as Maldon

  • Place eggs (older eggs will be easier to peel) in a medium heavy saucepan. Add water to cover by 1½”. Bring to a boil; immediately remove pan from heat. Cover and let stand 10 minutes, then transfer eggs to a bowl of ice water to cool. Gently crack the eggshells and peel eggs under running water for ease. Spread butter or cream cheese on bread. Pack eggs, bread, and cucumber spears in separate containers. Pack a pinch of sea salt in a bottle cap and seal tightly with plastic wrap.

Office Lunch: Antipasti Plate

What’s better than cheese and crackers for lunch? Salami, too! Use whatever hard cheese and cured meats you prefer.


INGREDIENTS

  • 5 thin slices hard salami
  • 2 ounces hard cheese (such as Parmesan), cut into ½” pieces
  • ¼ cup assorted olives
  • 8 cherry tomatoes
  • 8 crackers

  • Pack salami, cheese, olives, and tomatoes in separate containers. Place crackers in a small resealable plastic bag to keep them crisp.

Office Lunch

From Bon Appetit.

Lunch al Desko: Upgrade Your Midday Meal

Imagine an office meal you’re actually excited to break for (no hard feelings, turkey sandwich)—think fiery Asian noodles, lemony avocado toast, or spiced soup dolloped with yogurt. With a few strategies, a bit of planning, and a little sea salt in your cubicle, weekday lunch can be as delicious and exciting as any meal of the week. Here’s how to rethink the way you brown-bag it
NEVER EAT OUT OF A PLASTIC CONTAINER
Why does everyone have a “favorite” coffee mug but shovel pasta salad from an old takeout container? Keep a real bowl, plate, glass, and set of silverware at work. We’re not talking porcelain, but it’s practically scientific fact that food tastes better when eaten from a legit plate, with a fork that won’t snap when you stab a piece of chicken.
STOCK YOUR PANTRY (YOUR DESK-DRAWER PANTRY, THAT IS)

1. MUSTARD: A dollop adds bite to salad dressing; a spoonful and you’re halfway to a ham sandwich. If you prefer, find some real estate in the office fridge.
2. SEA SALT: Oh, weird: That’s what all the food from the cafeteria was missing. Jacobsen and Maldon both make tiny office-friendly tins.
3. TOGARASHI: Think of it as salt, pepper, and chile flakes in one. Sprinkle over rice bowls, hot soups, or leftover veggies.
4. VINEGAR: Punch up everything from slow-cooked beans to blah deli meat.
5. OLIVE OIL: Drizzle on soups, toss with grains, or whip up an on-the-fly vinaigrette.
6. PEPPER GRINDER: Because you won’t find much flavor in those little paper packets.
7. MARCONA ALMONDS: Great for snacking or for making the lunch bowl of your dreams.
8. HOT SAUCE: El Yucateco, Texas Pete’s Cha!, Cholula. That’s just a sample of the BA office hot-sauce cache. Apply liberally.
9. WASA CRISPBREAD: A blank canvas for open-face sandwiches. Or top with peanut butter for a snack that beats the vending machine.

KNOW WHEN TO DRESS AHEAD
“If I’m bringing a salad to work, it’s got to have spunk—that means bold flavors, like olives and salami—so I’m not bored halfway through. And it has to be hardy enough to dress in the morning: I’m not interested in soggy spinach or in carrying an extra dressing container to the office. So I seek out kale, chard, radicchio: the rugged ones. I especially love adding bread to soak up the extra dressing and to bulk it up.” —ALAINA SULLIVAN, JUNIOR DESIGNER
WHEN IN DOUBT, DO AS THE FRENCH DO

For a virtually no-prep meal that nonetheless feels like a special treat, bring in slices of good hard salami, some cheeses (you’ve got some nubs in the fridge, right?), and a hunk of baguette. It’s effortless yet dignified—a.k.a. very French.
1. Bring in a small cutting board and you won’t remember what you did without one.
2. Keep a small, sharp knife for slicing. Anything too big and you’ll just scare people.
3. Throw in some fruit, olives, or nuts and you’re basically on the Riviera.
THE LUNCH BOWL IS YOUR NEW GO-TO
Stroll through our offices around lunchtime and you’ll see our staff mixing and matching grains and greens, vegetables and meats, nuts and herbs. Call it a revolution? Fine by us. Just don’t call it a salad.
THE BASE: Choose grains, greens, or both. Keep some prepped in your fridge at home for fast assembly.
GRAINS Stick with whole grains—freekeh, farro, red quinoa (color!), and brown rice (white rice doesn’t hold well). Unless you’re going to reheat the grains, dress them at home so they can absorb some flavor.
GREENS Our new obsession is Little Gem. As for kale—sorry, we’re not over it. Pack dressings for delicate lettuces separately; dress hardy ones at home.
THE PROTEIN: What do you call a lunch bowl without a protein? A snack.
EGGS We try to have hard-boiled on hand, but when we’re time-pressed, the Fluffy Omelet (i.e., the lazy man’s version) takes just five minutes before work.
SPICY GARLIC CHICKPEAS You could use plain chickpeas (or beans), but they’re not this addictive.
LEFTOVERS! Yes to day-old roasts or braises (just shred them, discarding fat).
SMOKED TROUT All the benefits of canned tuna, without the coworker glares over the smell.
THE GOOD STUFF: Fatty, salty, crunchy mix-ins like cheese and nuts are the difference between satisfactory and satisfying. Choose at least two.

Lunch Bowls

1 OF 6
PREVIOUS
NEXT
ROASTED CHERRY TOMATOES Cooked with olive oil and herbs, they burst and release tomatoey juices for an extra layer of seasoning.
ZA’ATAR PITA CRISPSYour new, improved crouton.
SAVORY GRANOLA A restaurant trend worth bringing to work; use it as you would nuts.
SEEDS A sprinkle of toasted sunflower, pumpkin, or sesame seeds works especially well when there’s a creamy element (like cheese or avocado) for them to stick to.
RAW VEGGIES Julienned beets or carrots, sliced snap peas, fennel, cabbage: They’re excellent sources of crunch (and, you know, nutrients).
FRESH TENDER HERBSKeep the leaves whole; chopped herbs will brown by lunchtime.
FETA This feisty and crumbly cheese is our first pick for salads. Other punchy cheeses (think aged cheddar or blue) will work, too.
JARRED PEPPERONCINI Spicy, tangy, and not just for sandwiches.
MARCONA ALMONDS Any nut adds substance, but rich Marconas make lunch feel decadent.
AVOCADO …Obviously.
THE DRESSING: It’s the (delicious) glue that binds the whole bowl together. Our suggestions:
OPEN UP TO THE OPEN-FACE SANDWICH

Just because an open-face sand-wich doesn’t transport well—or at all—shouldn’t mean it gets kicked out of the lunch club. Do as the Scandinavians (and lots of us) do: Grab some good bread (dense rye is ideal), something spreadable (ricotta, mustard, hummus), and produce and/or protein. Pack the components separately—slice them at home or at work (your call). You’ll have a freshly made sandwich that didn’t spend the morning getting soggy in the fridge and somehow looks…sophisticated.
A FEW IDEAS TO GET YOU STARTED:
1. Best-quality ham + unsalted butter + Parmesan
2. Smoked trout + labneh + fresh dill
3. Sliced hard-boiled eggs + salted butter + radishes
4. Hummus + avocado + dressed shredded carrots

THINK TWO MEALS AHEAD
“I’m not a morning person; it’s a victory for me to get out the door kind of on time. So I cook for lunch during the weekend, making lentils, baked pastas, or soups like this one, which I’ll portion out into jars. It tastes even better the next day and makes plenty for the week (I just freeze any I don’t get to). So when I’m bleary-eyed and undercaffeinated, all I have to do is literally grab and go.” —DAWN PERRY, SENIOR FOOD EDITOR
THE CONTAINER COUNTS
The right container—nice to look at, easy to carry, spill-resistant—takes the hassle out of getting lunch from home to work. After rigorous testing, we found a few favorites:

Available in several shapes and sizes, Wean Green [1] (from $23; weangreen.com) and Kinetic Go Green GlassLock Food Storage [5] ($35 for set of 3; surlatable.com) locking tubs are super-reliable and microwave-safe.
Got soup? The screw tops on Ziploc Twist ‘n Loc Containers [2] ($4 for set of 2; amazon.com) make them good for packing liquids safely.
If you don’t like your rice touching your tomatoes, try a tiffin like this three-tier metal lunch box [3]($9.50; pearlriver.com) or the sleek LunchBots Bento Trio [6] ($28; lunchbots.com), which has compartments.
And for the serious lunch aficionado, there’s no choice but the Zojirushi Classic Stainless Lunch Jar[4] ($69; amazon.com), an insulated cylinder with three microwavable bowls, chopsticks, and a strap for transport.
—JOANNA SCIARRINO
AS FAYE WOULD HAVE IT
No BA staffer is more committed to lunch than assistant managing editor Faye Chiu. She brings a multicourse home-cooked meal daily, and eats at a table away from her computer, like a table for one. Here’s a week of her meals.

MONDAY: Chicken salad with oregano on sprouted toast; warm sautéed kale and roasted kohlrabi; hot water with lemon and ginger
TUESDAY: Black beans with oregano over wild and brown rice with avocado and broccoli; cilantro tisane
WEDNESDAY: Black beans with garam masala over quinoa and wild and brown rice; garlic kale and steamed chicken dipped in garlic mayo; dark chocolate
THURSDAY: Homemade wontons in chicken broth
FRIDAY: Gluten-free fusilli with scallion-ginger pork (leftover wonton filling), cilantro, and garlic kale; mint tea
BRING AN AVOCADO AND YOU HAVE LUNCH…

We know people who simply throw an avocado in their work bag and figure out the rest later. Rich, filling, and versatile, the avocado needs only a couple other ingredients to make a complete meal. Some suggestions:
1. Mash onto crackers (or toast), top with a squeeze of lemon juice.
2. Slice onto steamed rice and sprinkle with togarashi and a few dashes of soy sauce.
3. Halve and drizzle with lemony vinaigrette.
4. Make a salad of cubed avocado and sliced cucumber; drizzle with olive oil and lime juice.
…AND THE SAME GOES FOR THE HARD-BOILED EGG
Hot on the tail of the avocado as our lunch MVP is the hard-boiled egg. Boil a batch on Sunday and you’ve got an in-a-pinch protein for the week. It’s the solution to the perennial problem: “It’s only 11 a.m., so why am I already starving?” And it magically turns a hodgepodge salad or a leftovers grab bag into something cohesive.

DON’T BE A SLAVE TO THE MICROWAVE
“When I traveled in Asia, cold noodles were a daily joy—one that translates beautifully to lunch in New York. Because it needs no reheating, I’m eating the dish as it’s meant to be eaten, not trying to resuscitate it in the microwave. Lately I’ve taken my cues from China’s Sichuan Province (my jar of homemade chile oil isn’t going to drain itself). It’s like I’m at that Chengdu teahouse all over again, without having taken a trip to our slightly scary office kitchenette.” —MATT GROSS, EDITOR, BONAPPETIT.COM
GIVE YOUR DINNER A MAKEOVER
The key to keeping leftovers interesting is transforming them. Don’t settle for last night’s chicken breast when you can have today’s chicken banh mi. Here’s how we revamp a few regulars:
1. Leftover chicken + celery + harissa mayo = CHICKEN SALAD WITH SOUL
2. Leftover pasta + beaten eggs + cooked over medium-high heat until set = IS THIS FRITTATA LEGAL?
3. Leftover steak + horseradish sour cream + a roll = ROAST BEEF SANDWICH WITH A KICK
COME ON, DO YOUR DISHES
“So, you brought your own dishes. It makes eating at your desk feel almost civilized, doesn’t it? Here’s the bummer—the kind that comes with adulthood: Now you have to wash them. (You’re not the slob who’s left his or her bowl in the sink for the past three weeks, the soapy water turning gray and, finally, green around the food-flecked edges? Didn’t think so.) Even if your mother did work here, she shouldn’t have to clean up after you. Make a designated dish kit, putting a brush and soap in a plastic takeout container. Civilized indeed.” —CHRISTINE MUHLKE, EXECUTIVE EDITOR
FINALLY, LISTEN TO OUR BOSS: YOU DESERVE A BREAK
“Yes, I realize this entire article is about eating lunch at your desk. But you know what’s depressing? Eating lunch at your desk. You’ve got, what, 30 minutes, maybe 45? Use them. Go sit in a park and eat lunch (one that you made yourself!), or even grab a chair in one of those office-building atriums. Just get up and go—somewhere. Your mind will thank you, your body will thank you, and if I’m your boss, even I will thank you.” —ADAM RAPOPORT, EDITOR-IN-CHIEF